The Stages to a Realistic CGI Visualisation
When creating a CGI Visualisation for a project, its best to go through a set routine to ensure that the end result is as expected. This often requires collaboration and regular dialogue between clients to keep everyone involved and on the same page. There are times when the project might be altered, therefore I need to adapt the visualisation to follow suit. Sometime this can occur after completing hours of work, only for it to be aborted and reworked from scratch.
The method we currently utilise a combination of techniques we have learned over the years. Each of the CGI Visualisations can be broken down into 8 stages.
Existing Photo
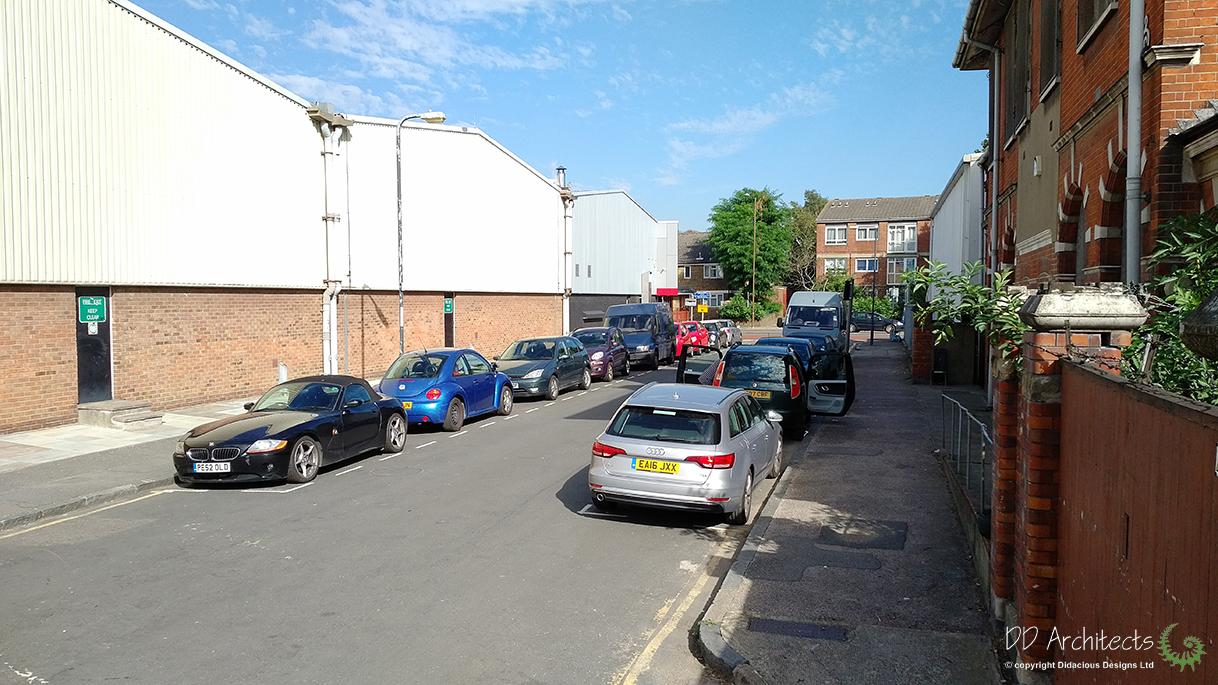 After Client consultation, we organise a trip to the site to get an understanding of the location. Photos are taken of the Key areas from different angles, determined by clarification of most importance for each CGI Visualisation. Here for example, the most important aspect, we determined, was how the proposed replacement of this dead end road, with a pocket park and cycle routes, would look from the view of the pedestrians currently using this route.
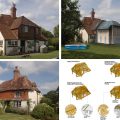
Photo Mark Up
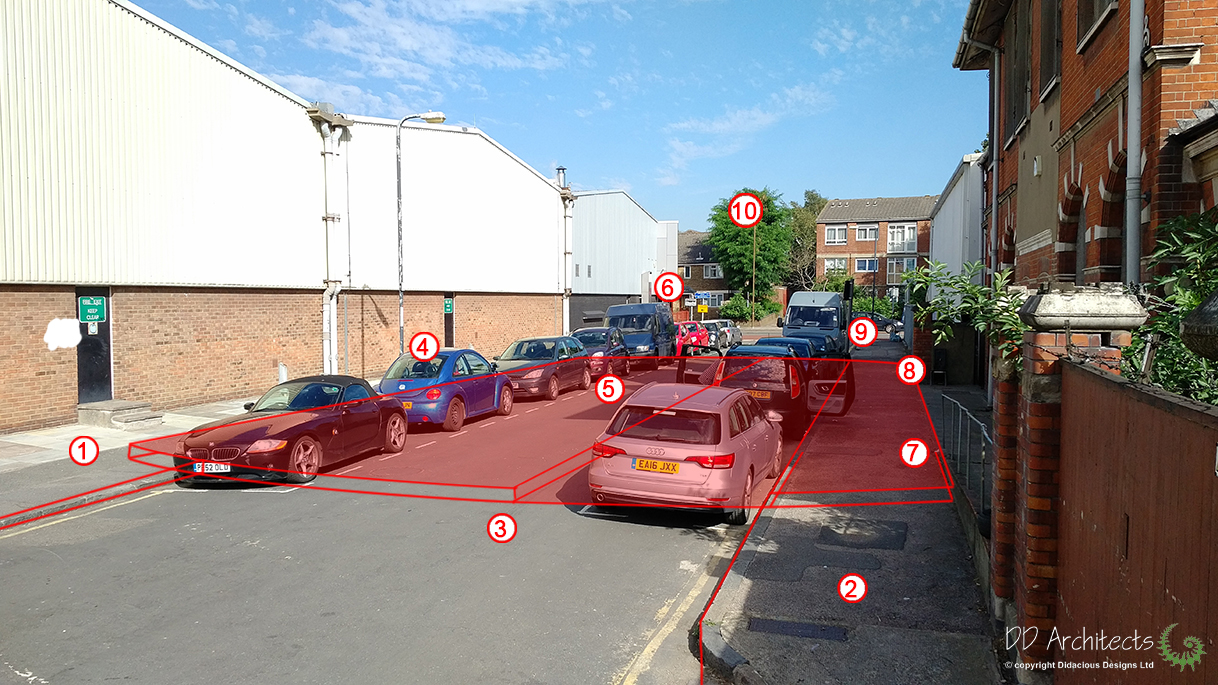 Once a photo had been selected that we believed would highlight proposed changes, a the photo was was marked up with a rough outline of the proposal to include numbered notes on the photo. The the notes range from comments regarding textures and surface treatments, to areas of interest or locations in the view that are not made clear in the plans. These things need to be determined early, prevent problems, later down the line.
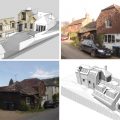
Photo-Matching
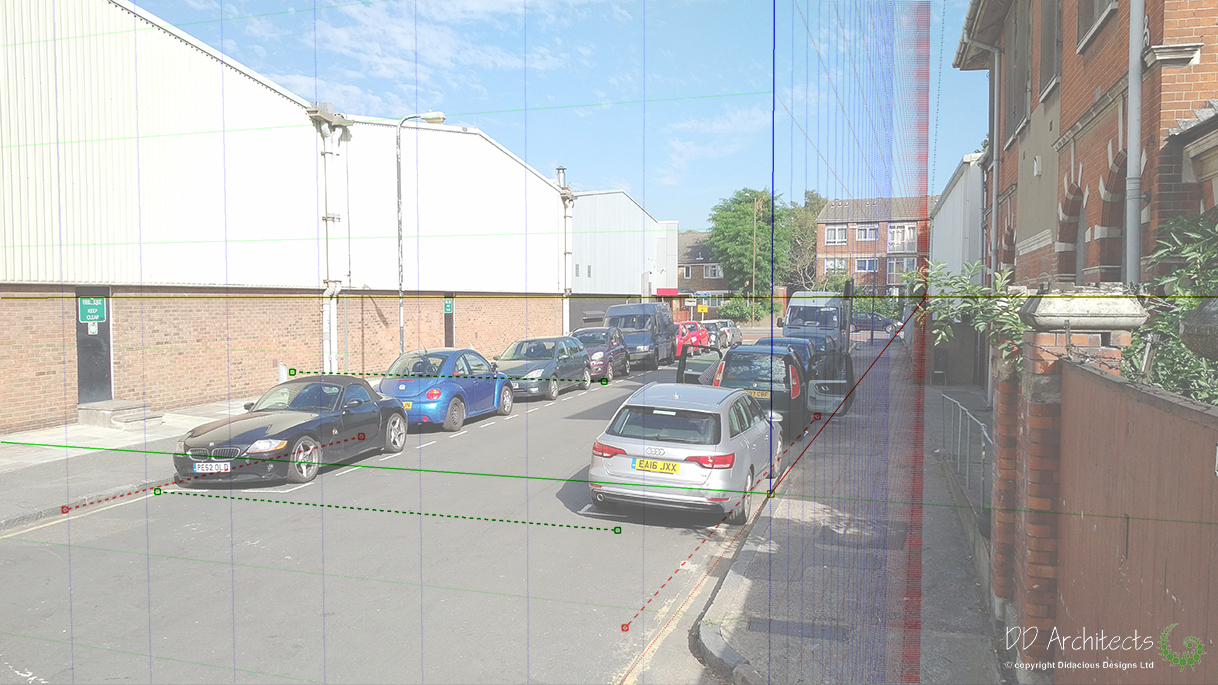 The photo is then lined up with the central Axis of the CAD program to create a Camera within the model, in line with the vanishing points from the photo. Each axis is determined by following lines in the photo, where possible, but since some locations are much more difficult than others, I often readjust the photo matching process as more and more detail was modelled in.
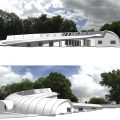
Clay Model
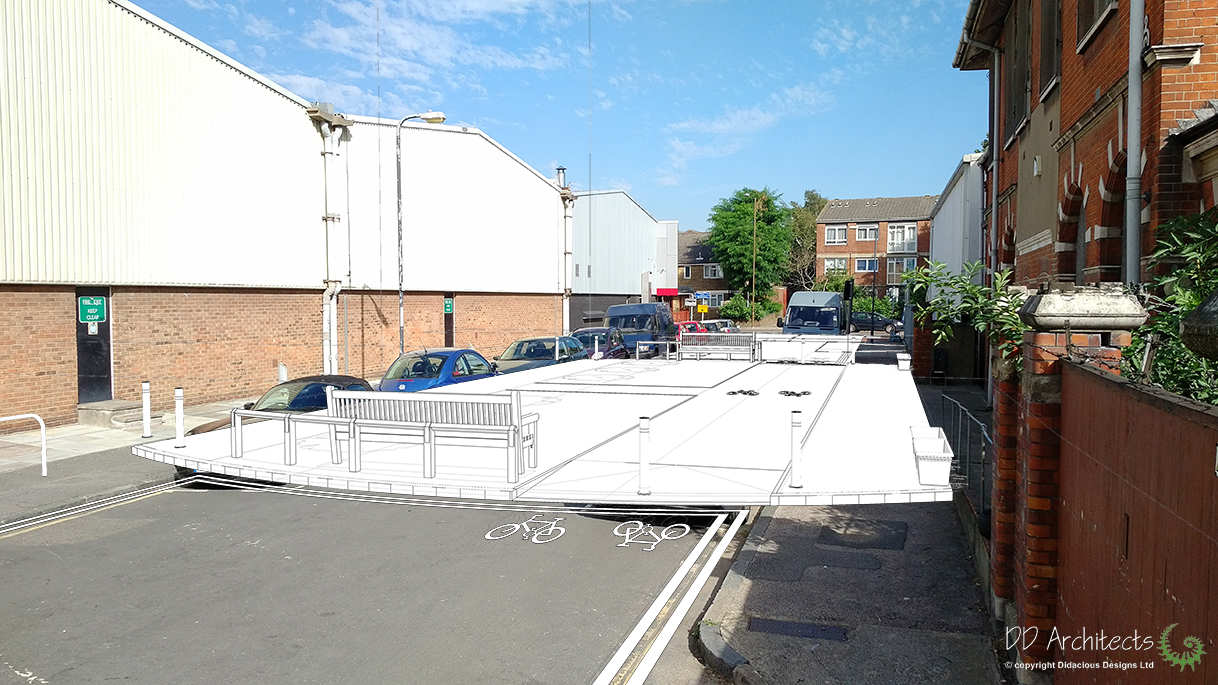 The plans and elevations for the project are used to model the proposal in 3D. We do this in both 2D line work and 3D extrusions. All of this needs to fit with the Camera created within the photo matching. The model is exported as a Clay render periodically to determine accuracy in consistency with the photo.
Texture
 Once I have completed modelling and the photo matching is determined, the model is textured and each surface edited to allow for lighting and shadows, before being rendered fully. The parameters for the surface treatments can sometimes be wrong, and, so a trial and error approach is often needed.
Rendering
 After determining all the surfaces and textures and usually after multiple attempts, the render is completed. I tend to edit the render slightly in photo editing software to add more realism, but usually this happens in line with the next stage.
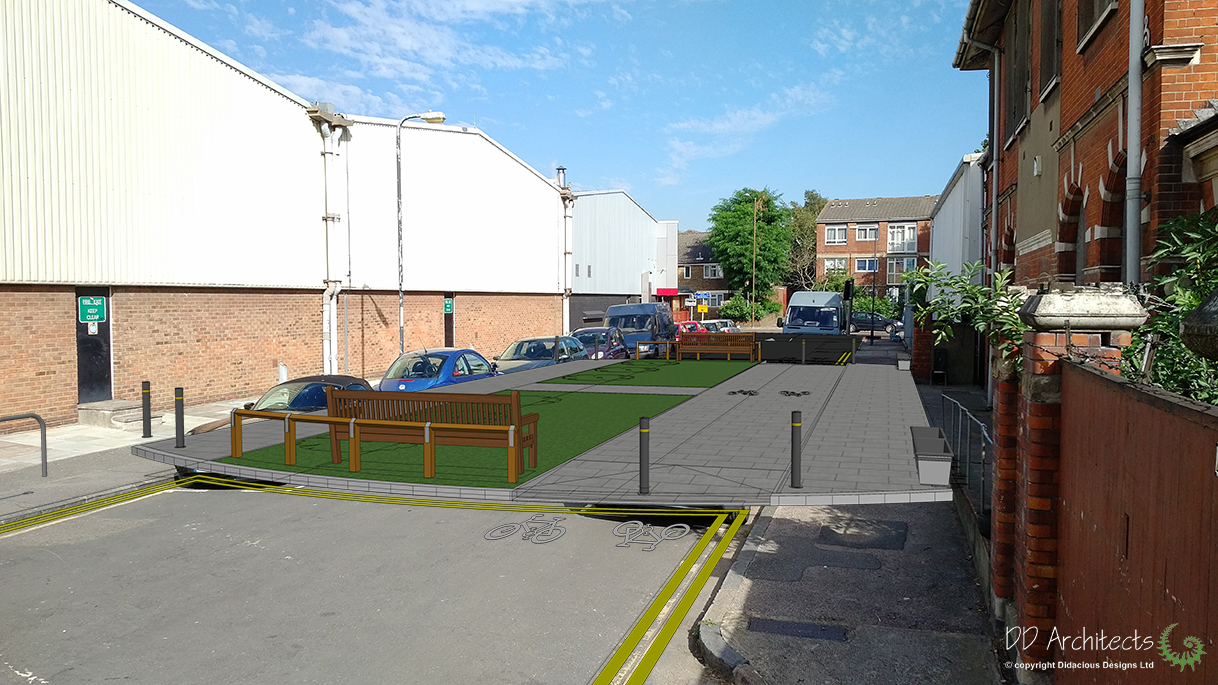
Matte painting
 This is the hardest task. What needs to happen here is the render and the photo need to merge. This requires a keen eye for detail. The photo needs to be ‘painted over’ to hide details that will be replaced, but at the same time, needs to fit perfectly with the render. Things like shadows and seams between two surfaces need to look natural, and often this can take twice as long as modelling the whole proposal. I do this by using various paint brushes and layer blending techniques.
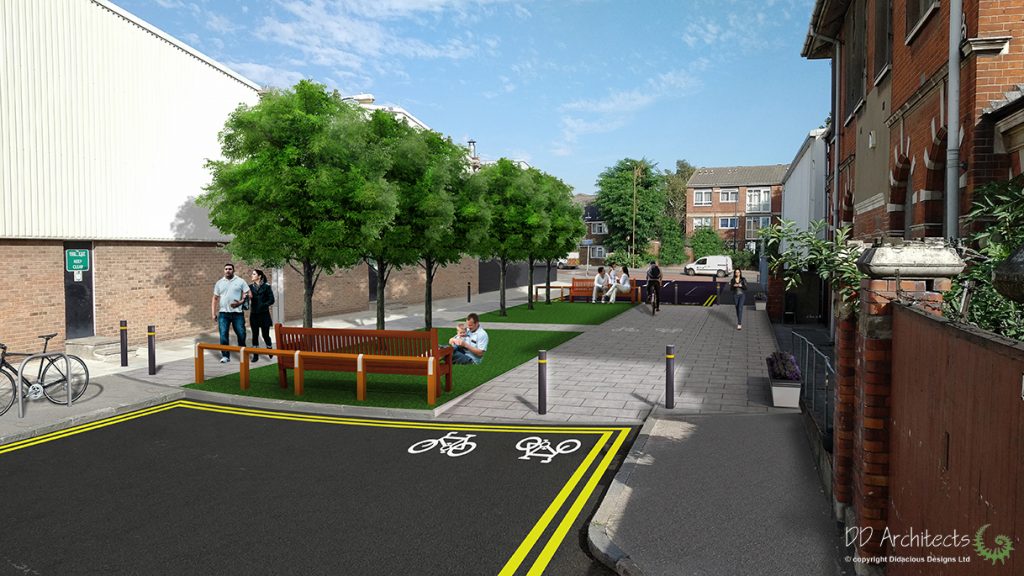
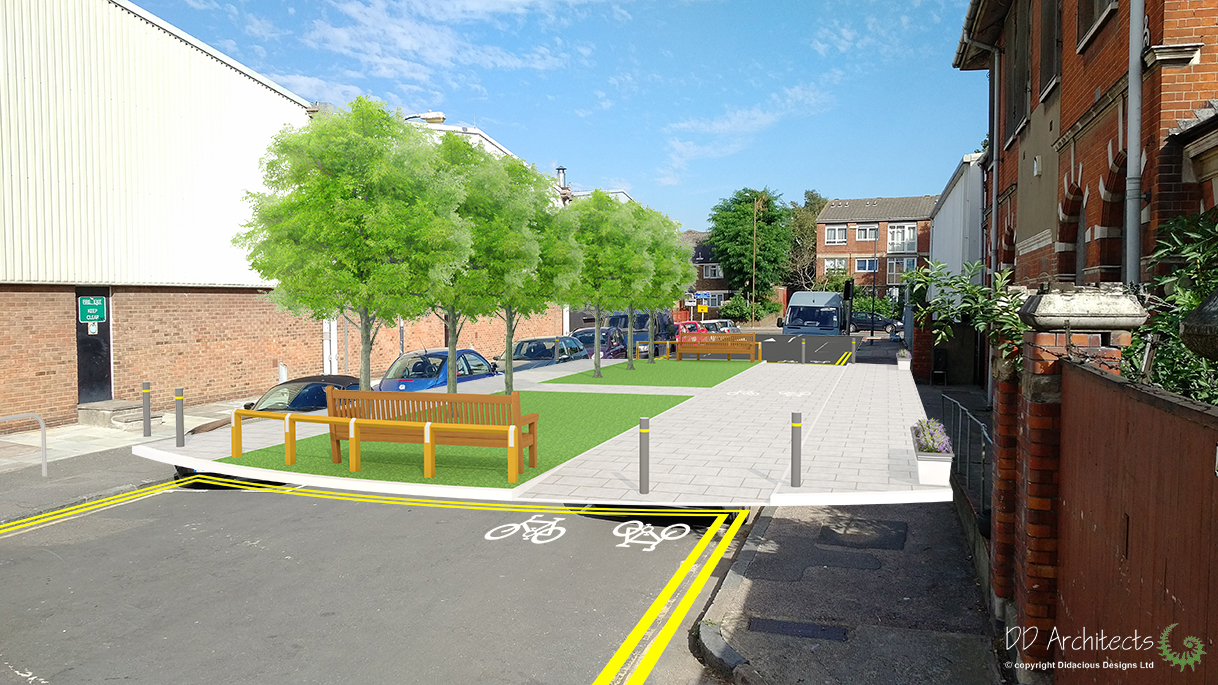
Populate
 The final stage is to populate the CGI Visualisation to give it life. This is done by adding people and users of the final created/designed space. The scale of the users needs to be very close to real otherwise the whole visual can look ‘un-natural’.
I like to think that a Visualisation is never really quite finished. Something can be made better, or things can be adjusted, but the end result is usually very representative of the proposed.