DD Architects
DD Architects
Studio
About Us
Meet The Team
Services
Advice
Friends
Portfolio
Gallery
Projects
43 King Street
86 Merton Road
132 Church Road
148 Preston Drove
238 Battersea Park Road
Broadstone Farm
Caldyne Land
Coach House
Cotterlings
Downside Meadows
Hastings Tower
Hook Farm
Hobbs Cottage
MoshiMo
Old Manor House
Park Cottage
Paxhill Poolhouse
Rowles Croft
Sketches
Sleepy Hollow
The Cottage
The Pines
West Brook House
Model
148 Preston Drove
Faulking
Sleepy Hollow
St Pauls School
The Cottage
3D Model
148 Preston Drove
Paxhill Poolhouse
Sleepy Hollow
Cotterlings
Coach House
Park Cottage
Hook Farm
RIBA Competition
Blog
Testimonial
Contact Us
DD Architects
DD Architects
Gallery
A Showcase Of Our Portfolio
All
sketches
drawing
3d model
model
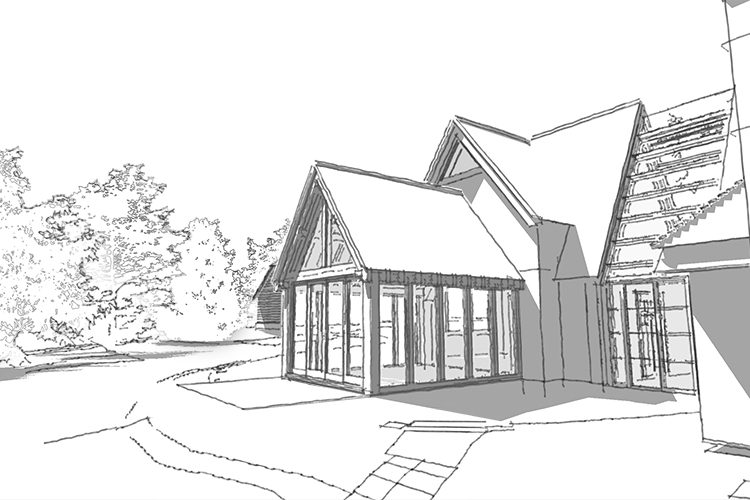
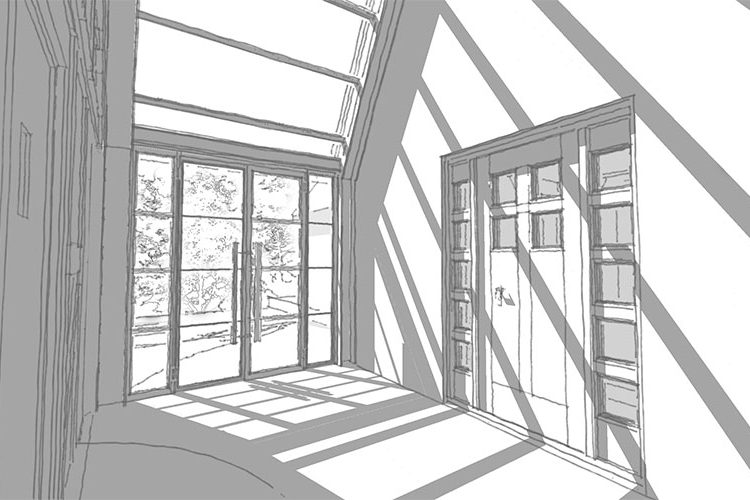
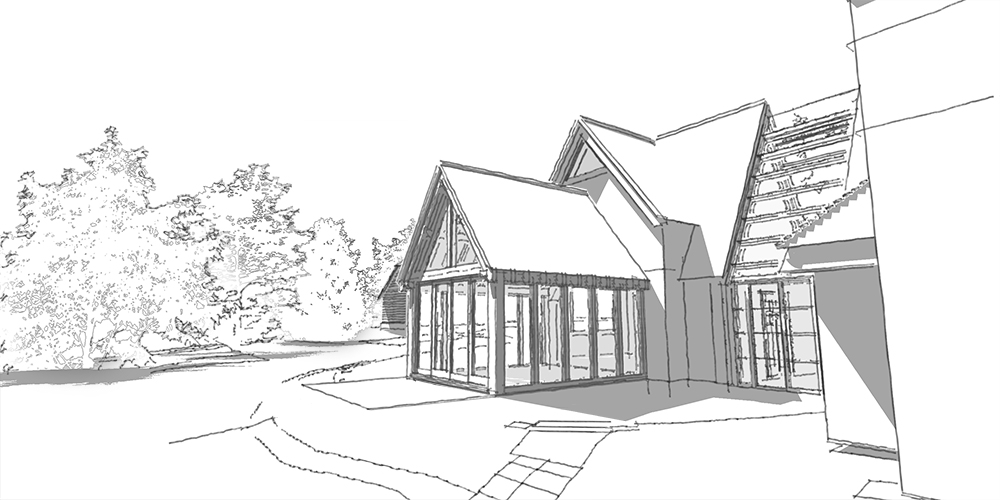
Bridleworth - Glass Link To New Extension
Sketches
Read More
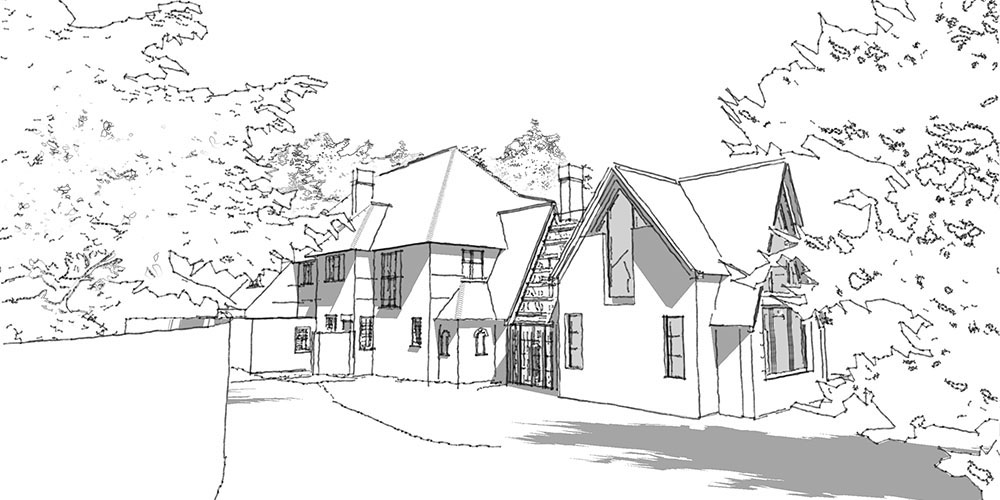
Bridleworth - New Modern Extension
Sketches
Read More
Bridleworth - Oak Framed Lounge
Sketches
Read More
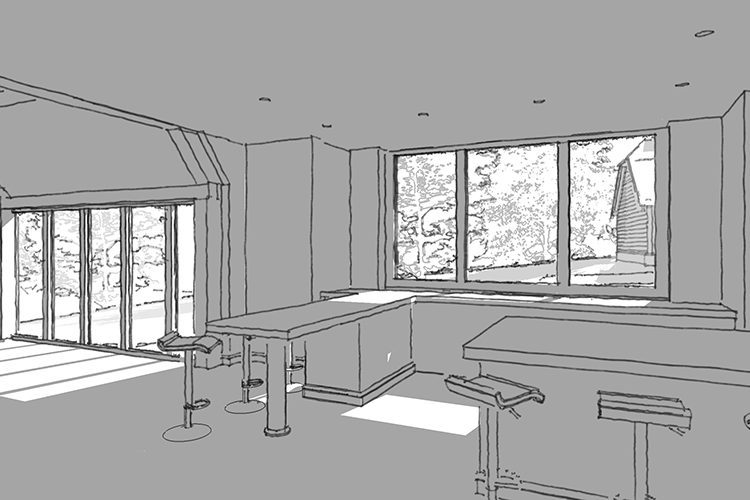
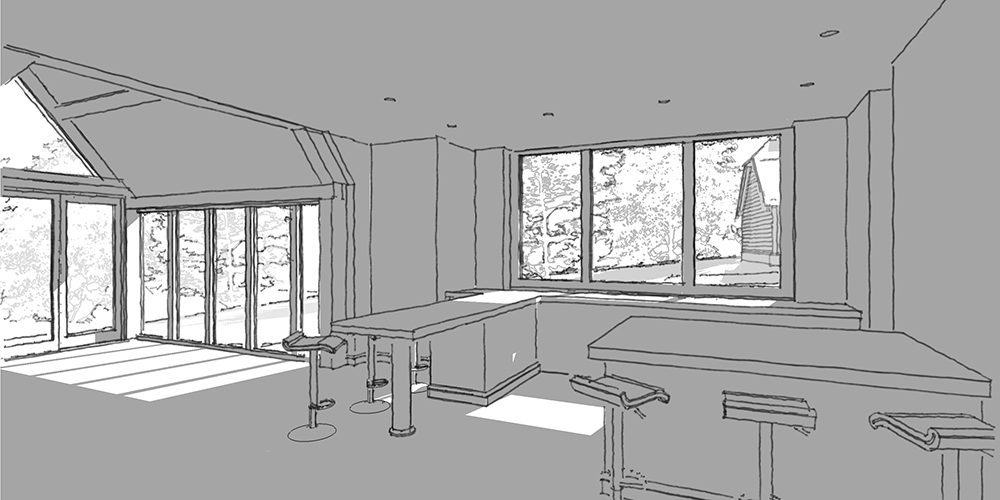
Bridleworth - Internal View of Kitchen, Dining & Lounge
Sketches
Read More
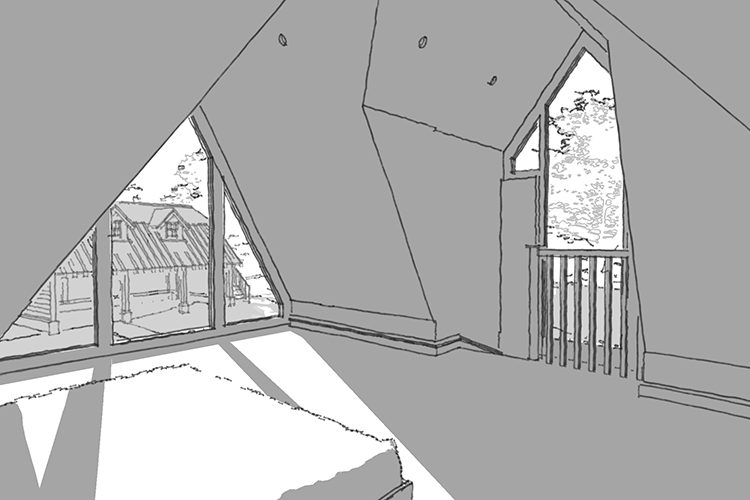
Bridleworth - Internal View of Bedroom
Sketches
Read More
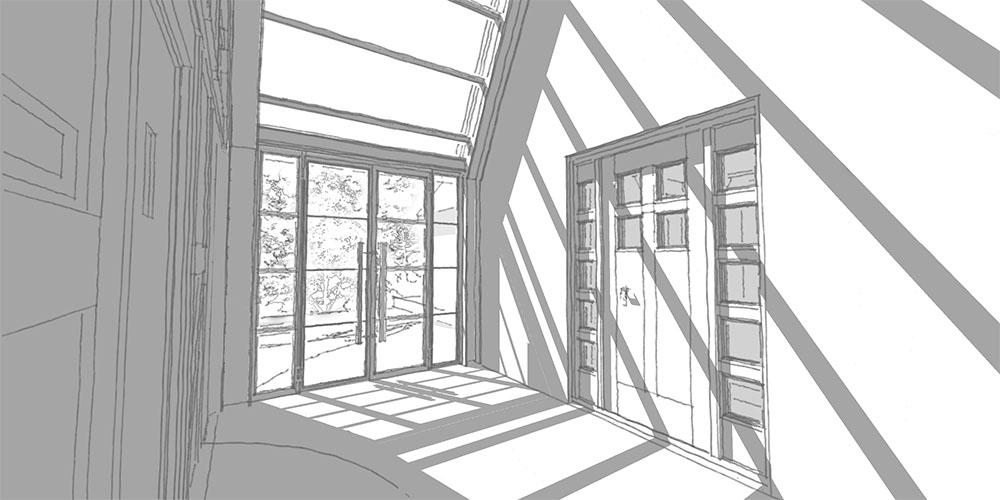
Bridleworth - Internal View of Double Height Glass Atrium
Sketches
Read More
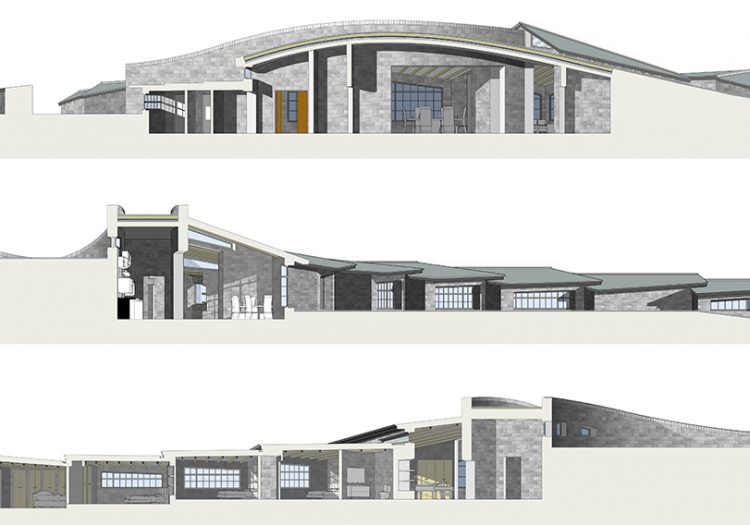
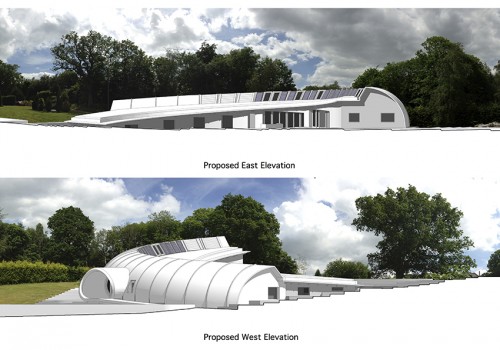
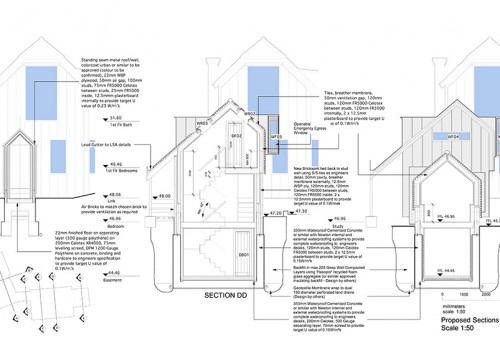
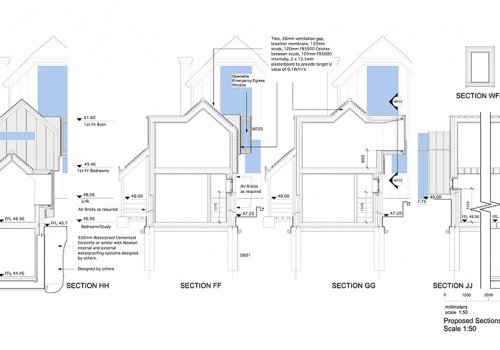
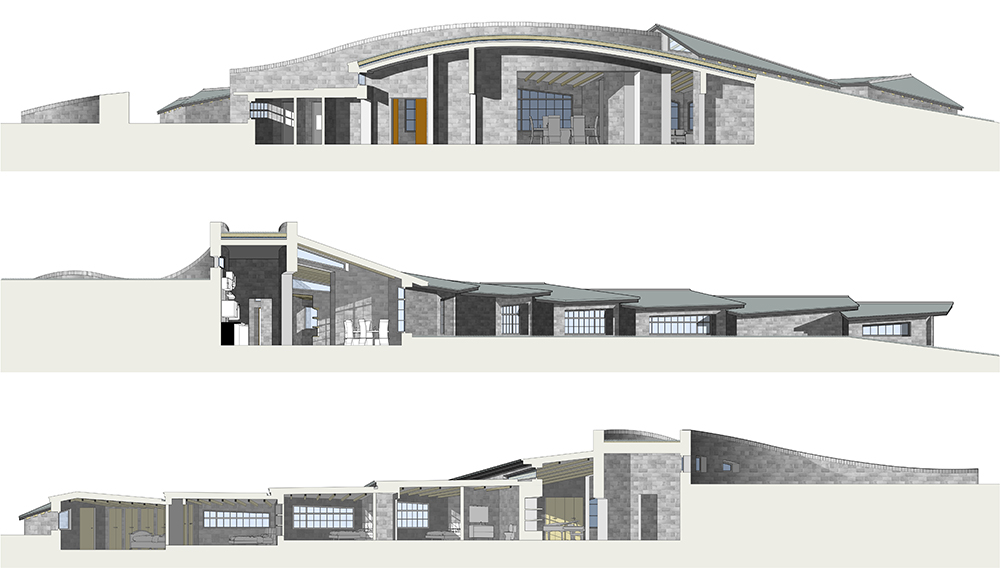
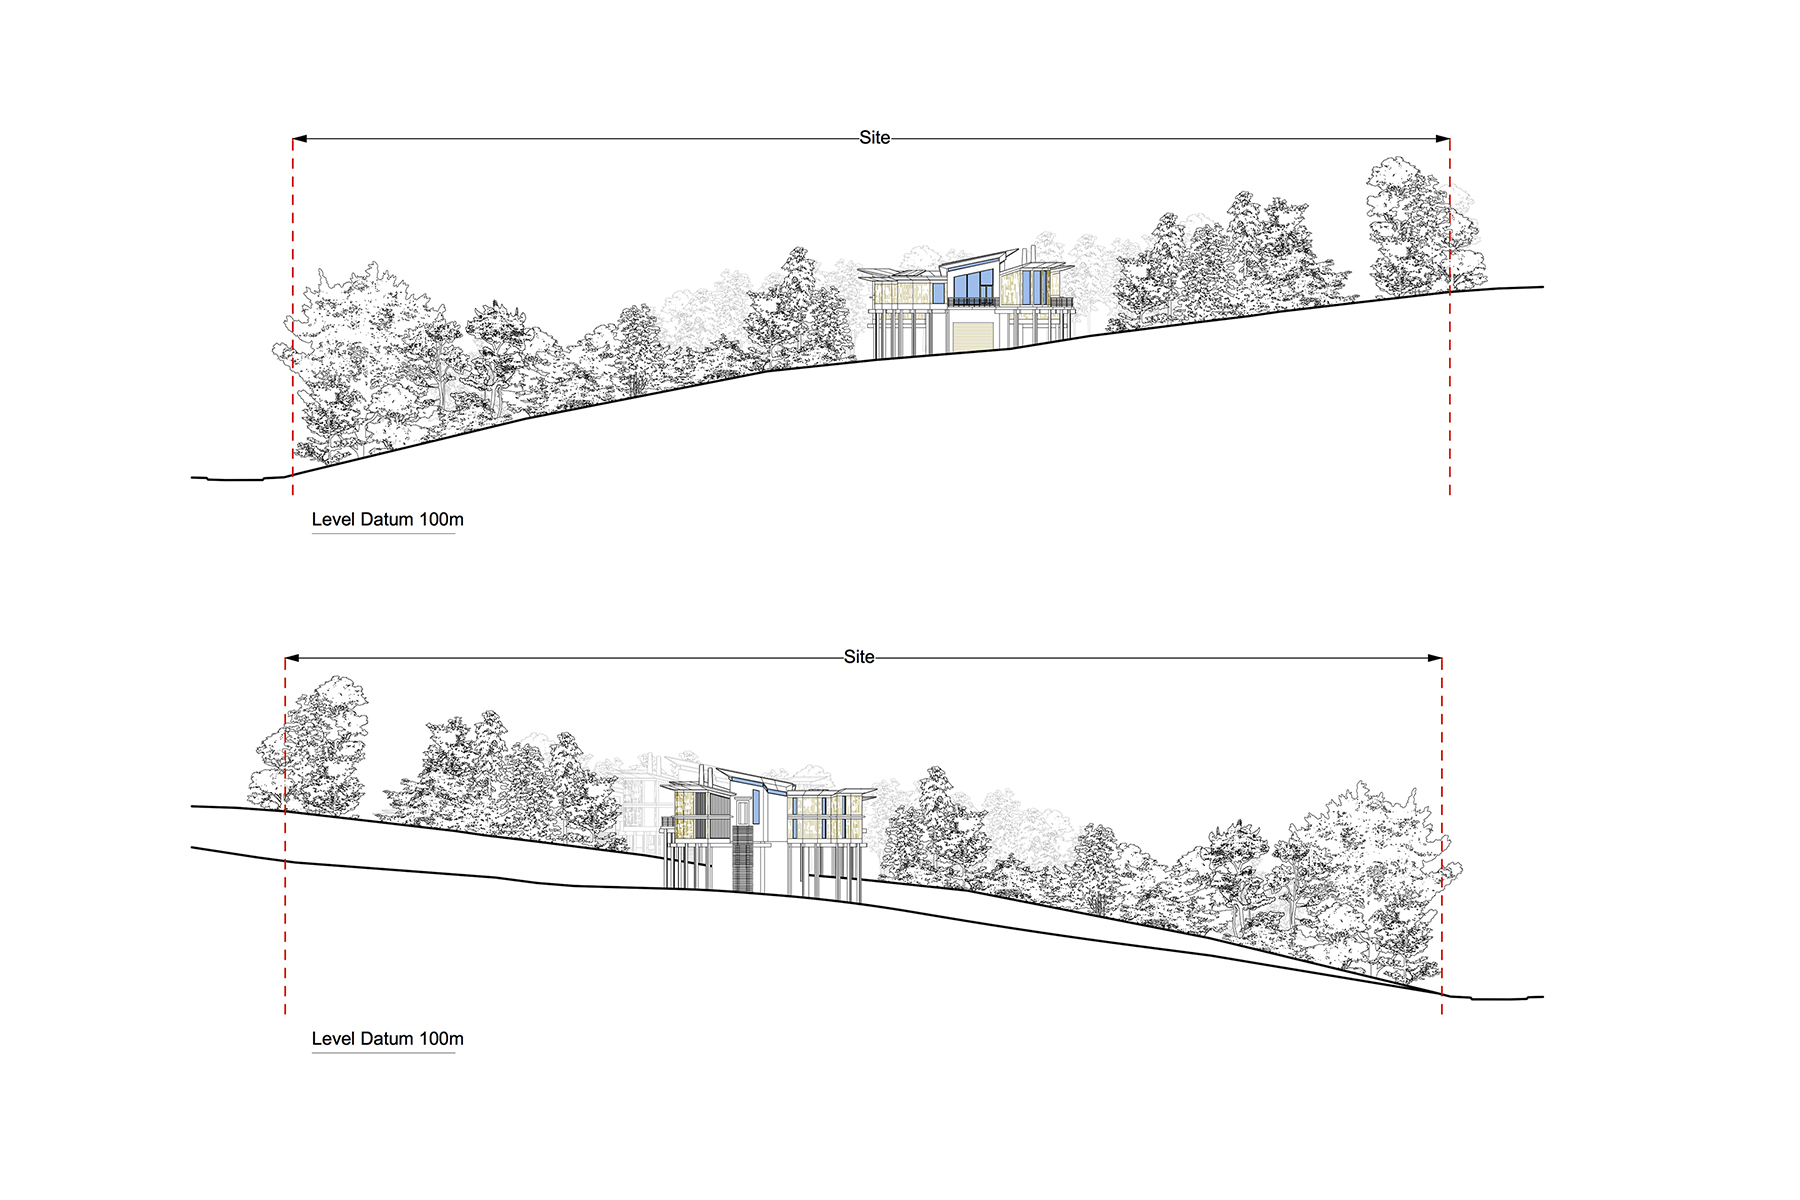
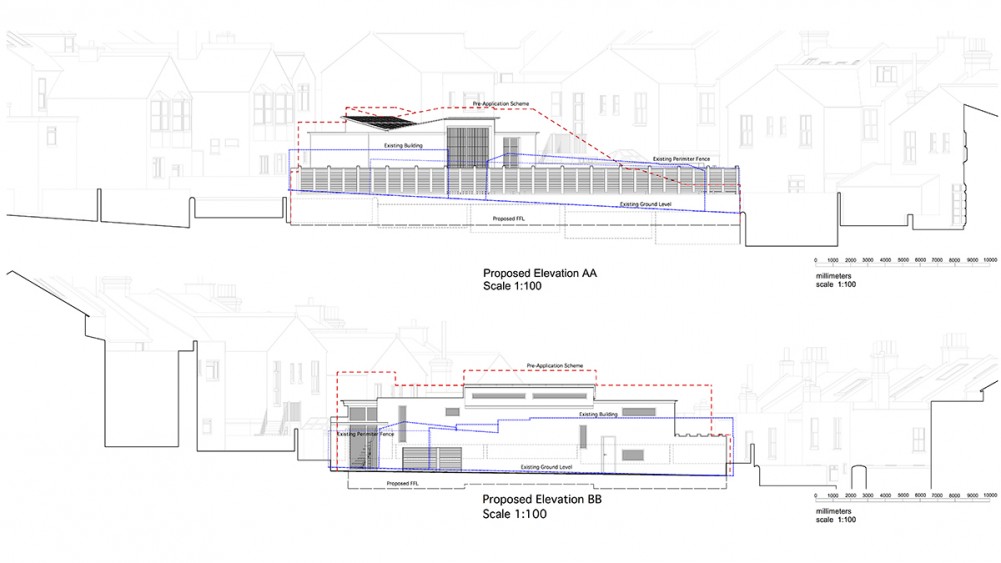
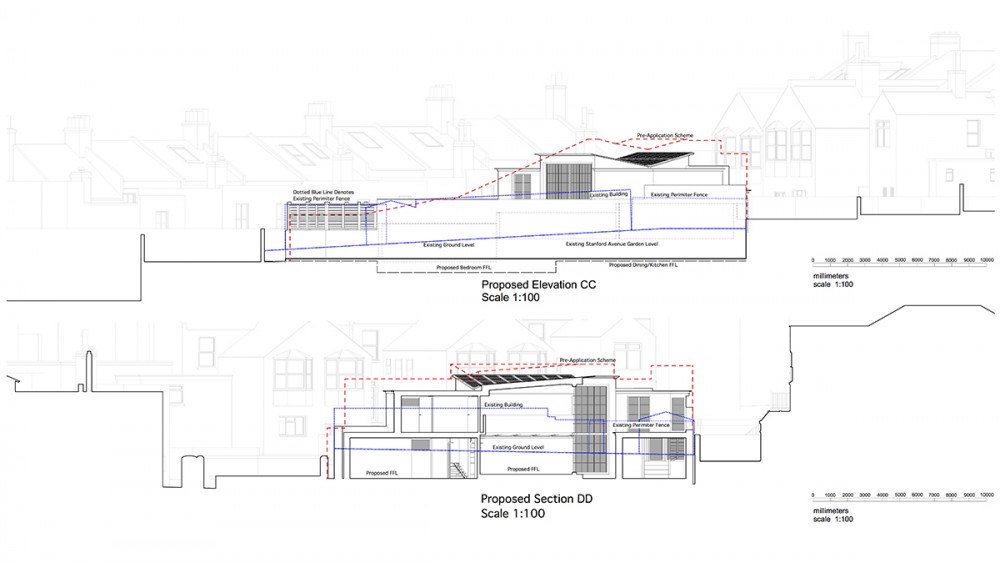
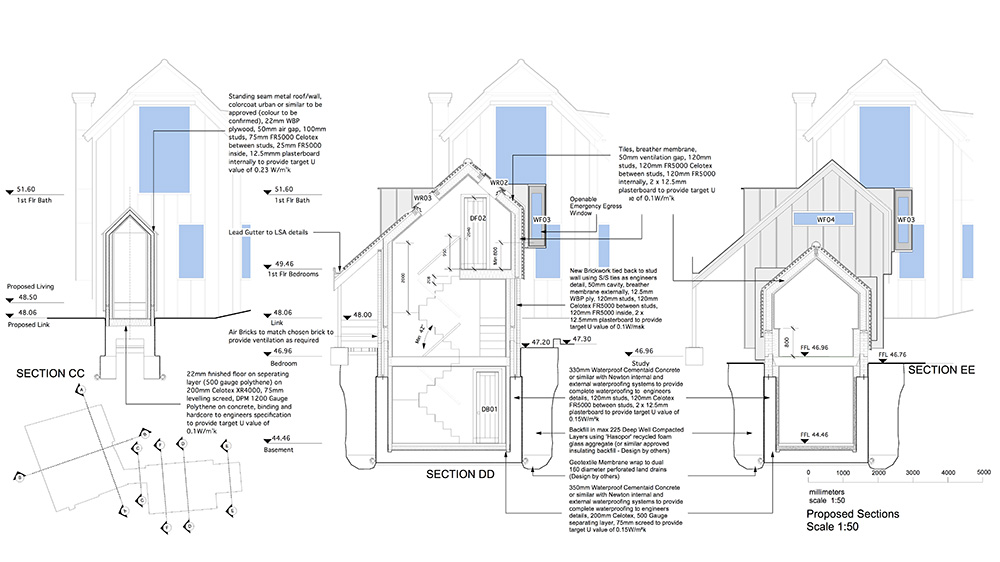
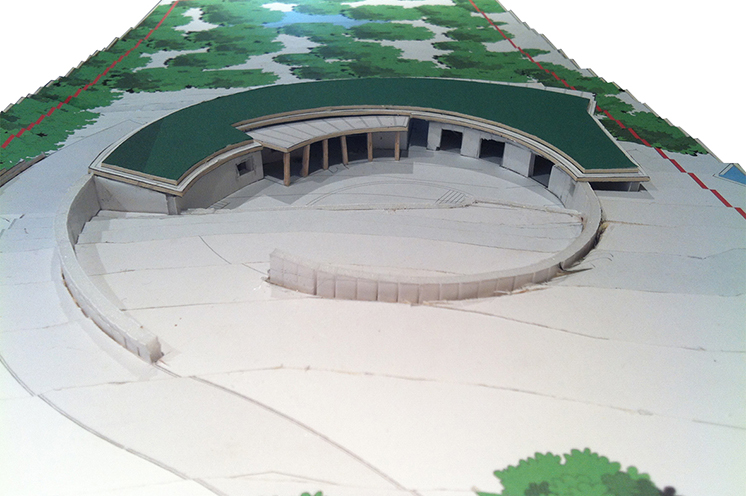
Exceptional Dwelling - Sections
Drawing
Read More
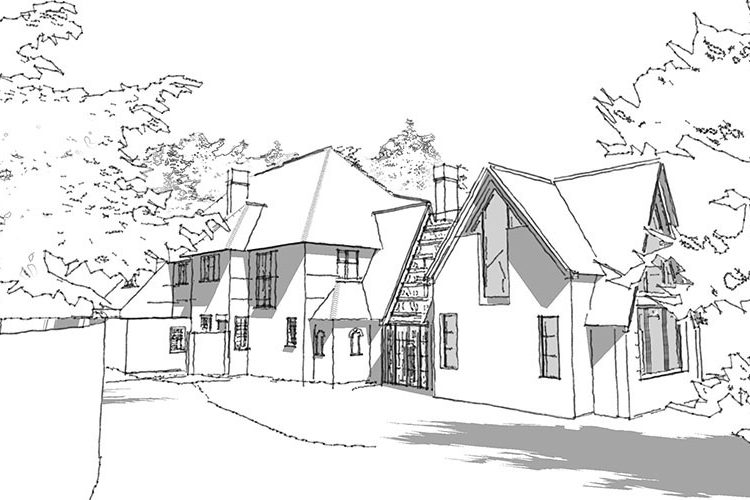
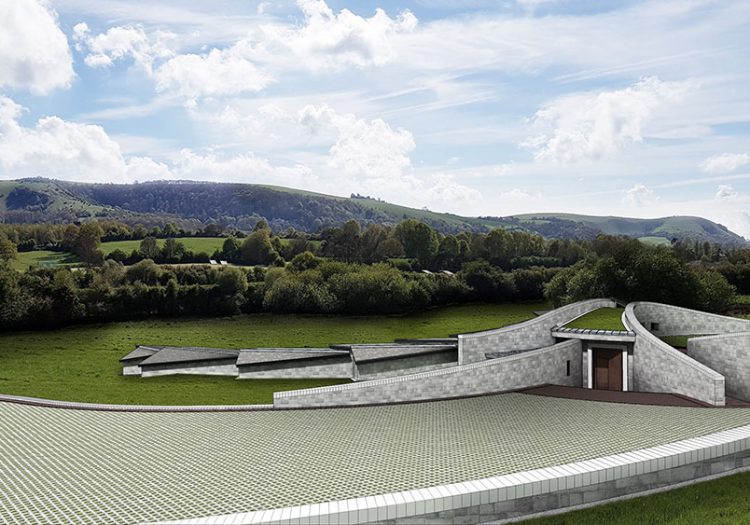
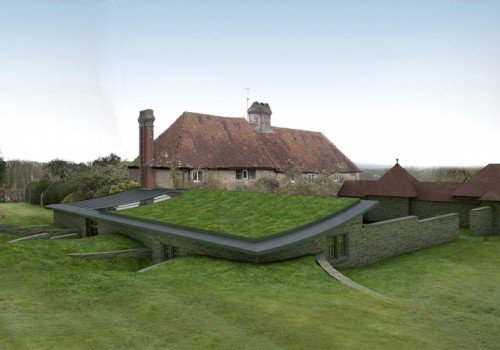
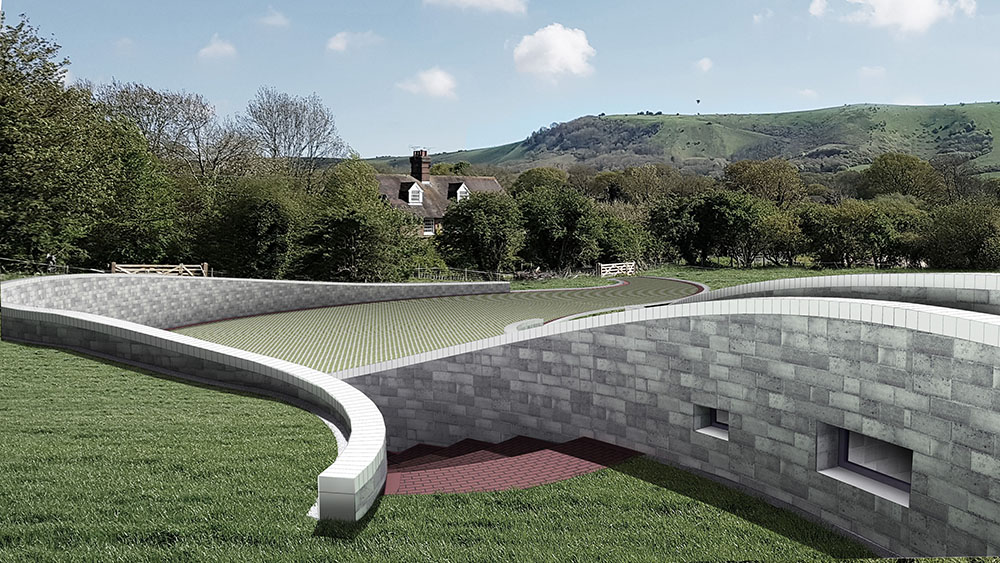
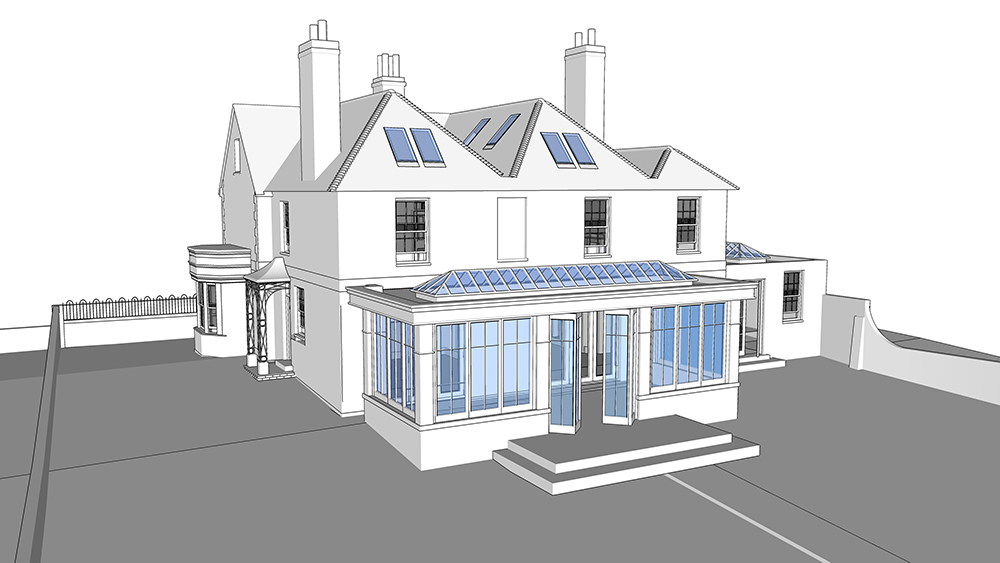
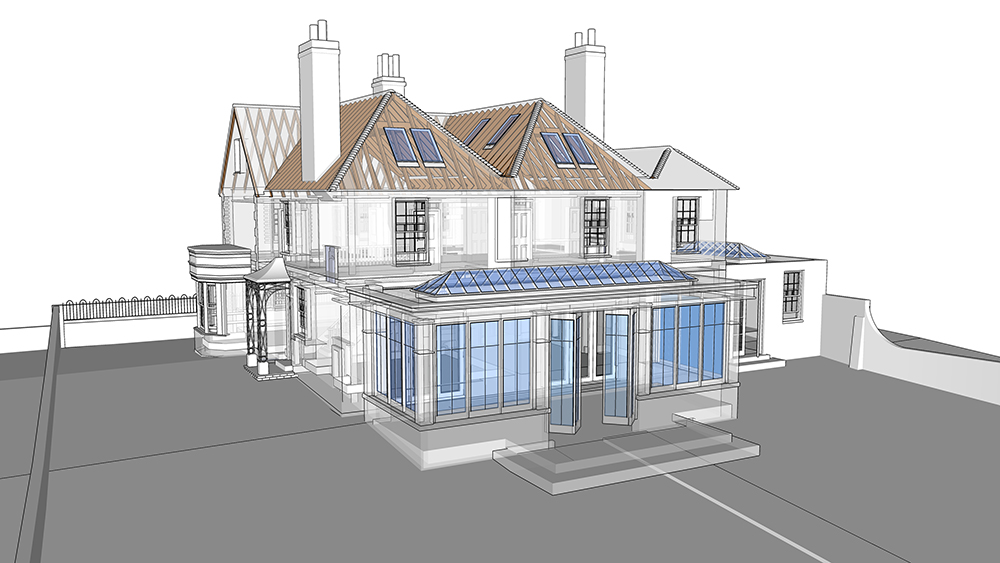
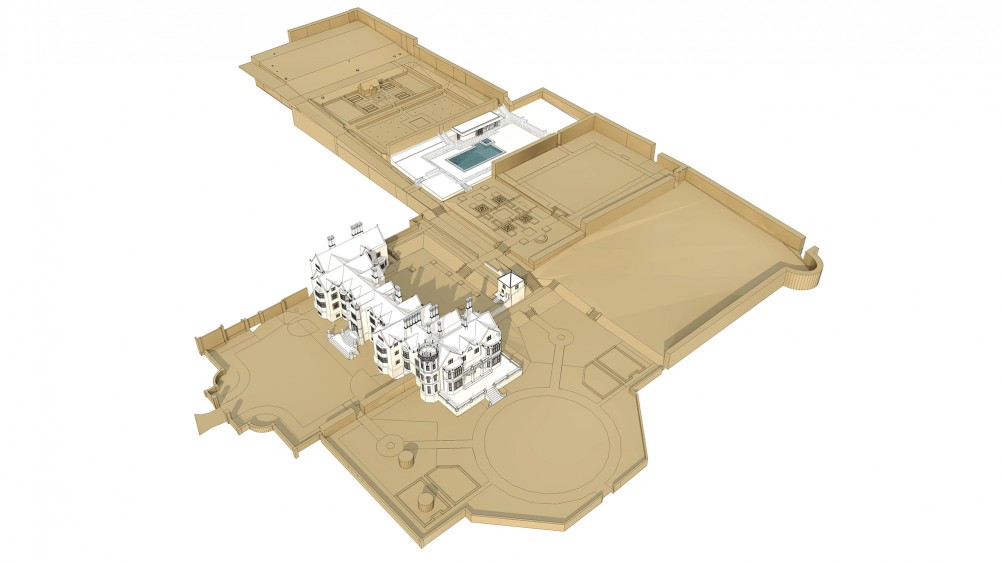
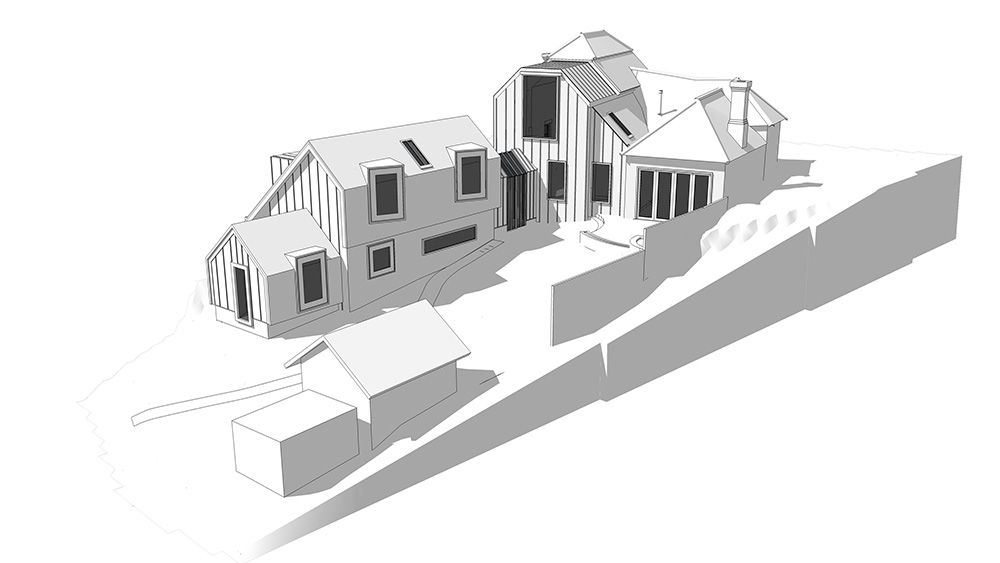
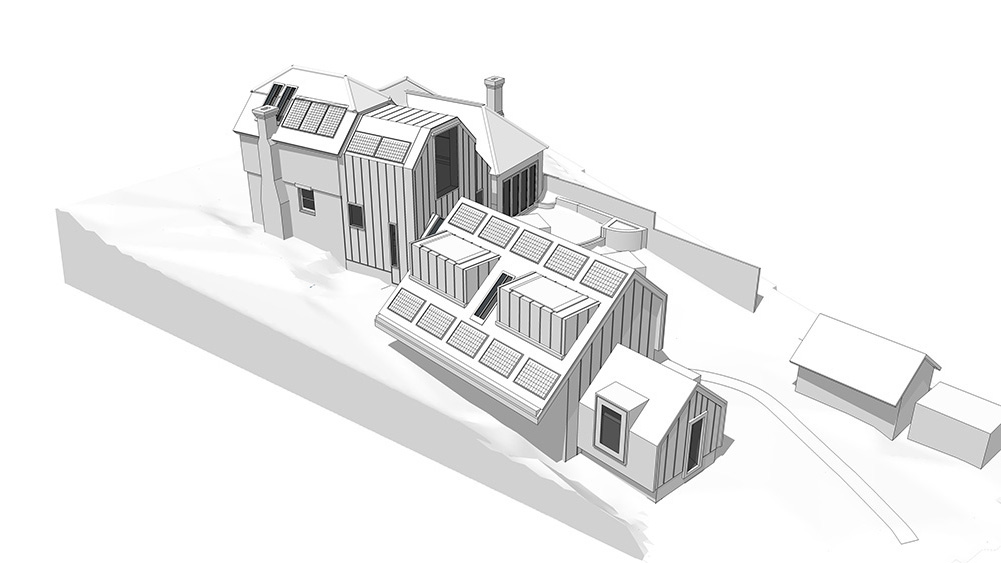
Exceptional Dwelling - View Northeast
3D Model
Read More
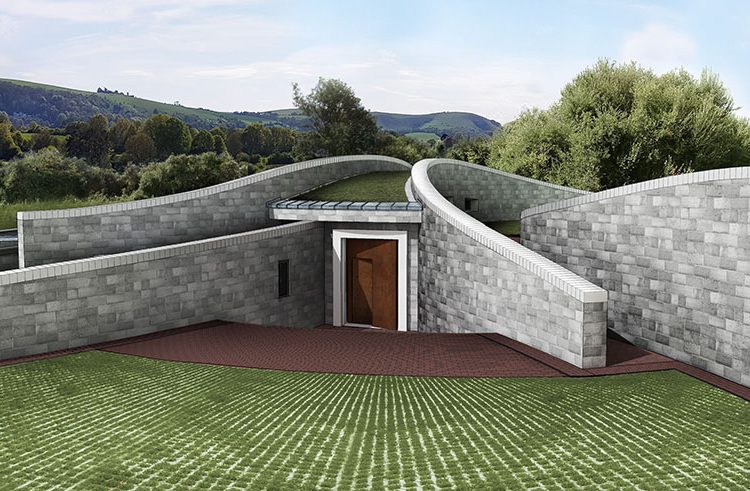
Exceptional Dwelling - View Of Entrance
3D Model
Read More
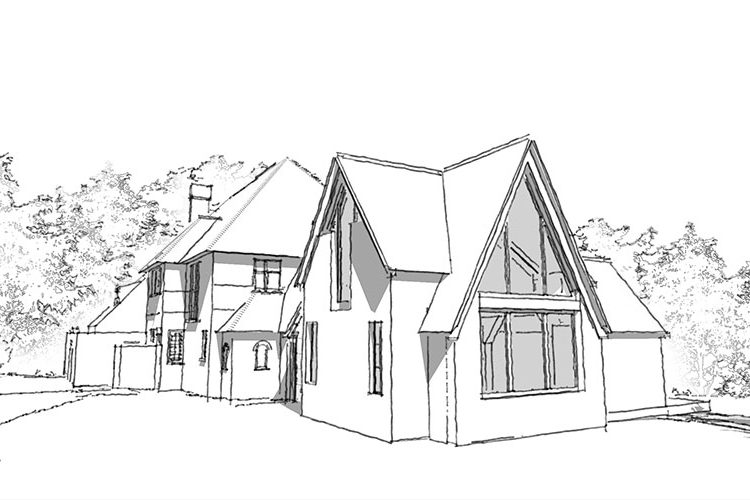
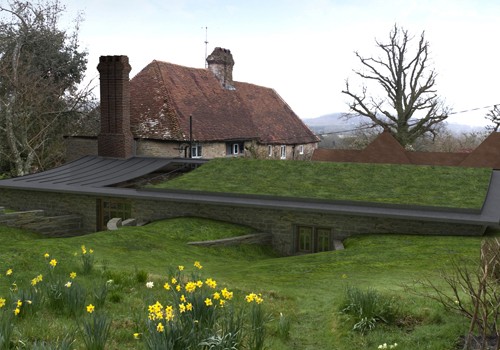
Exceptional Dwelling - View to The Beacon
3D Model
Read More
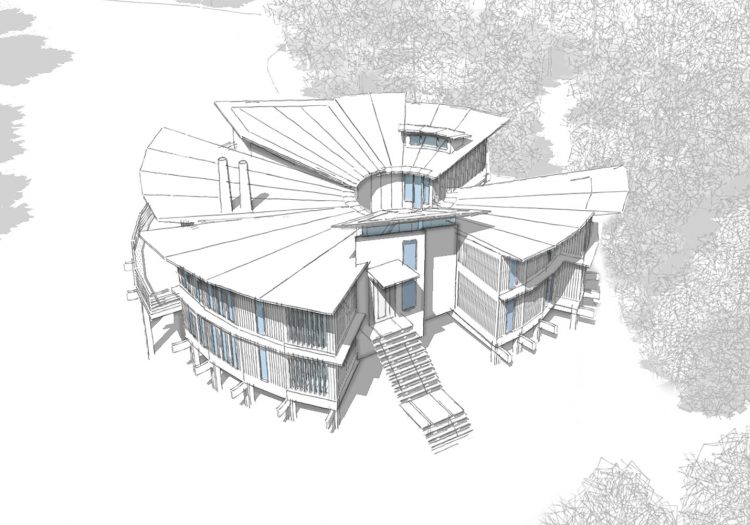
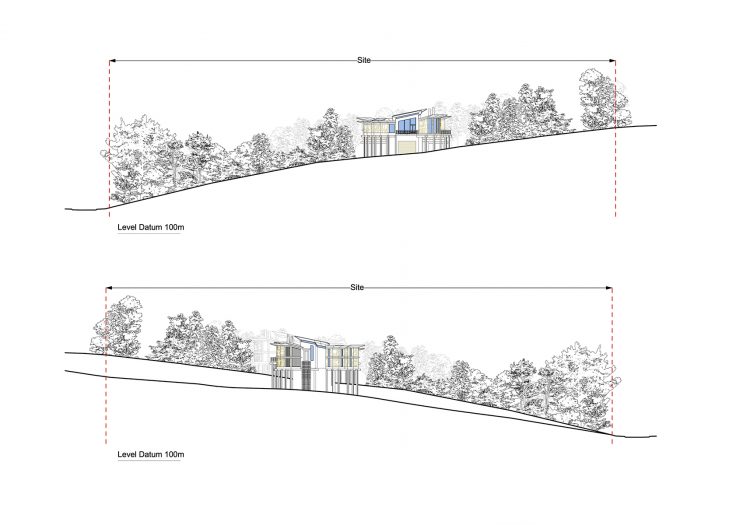
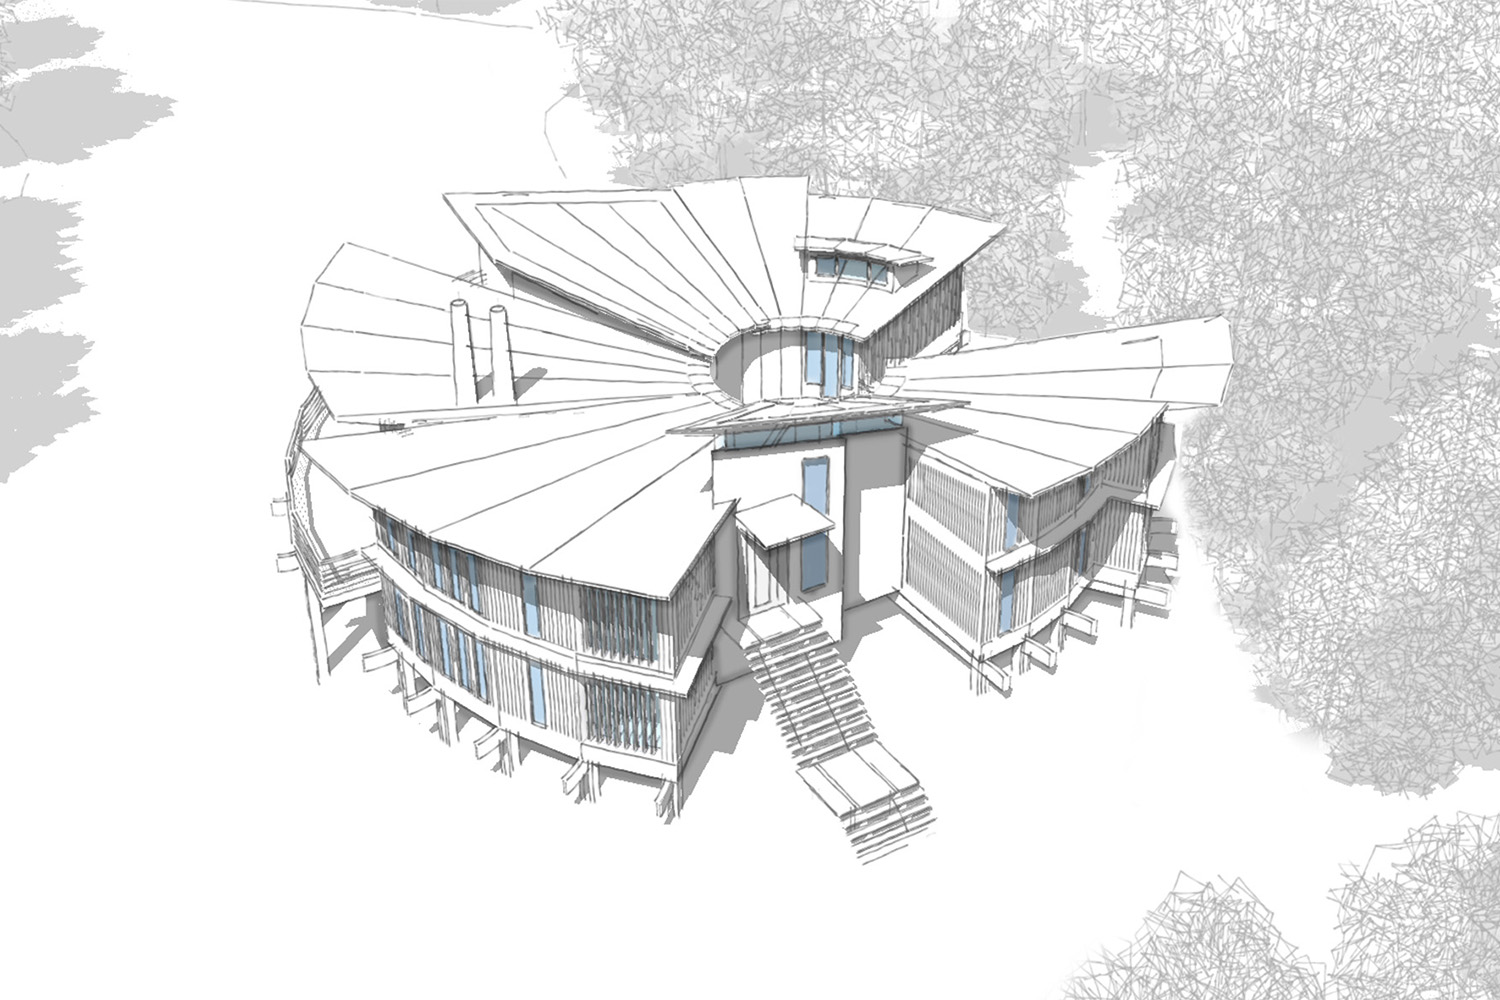
Caldyne Land - House 01 Aerial Sketch
Sketches
Read More
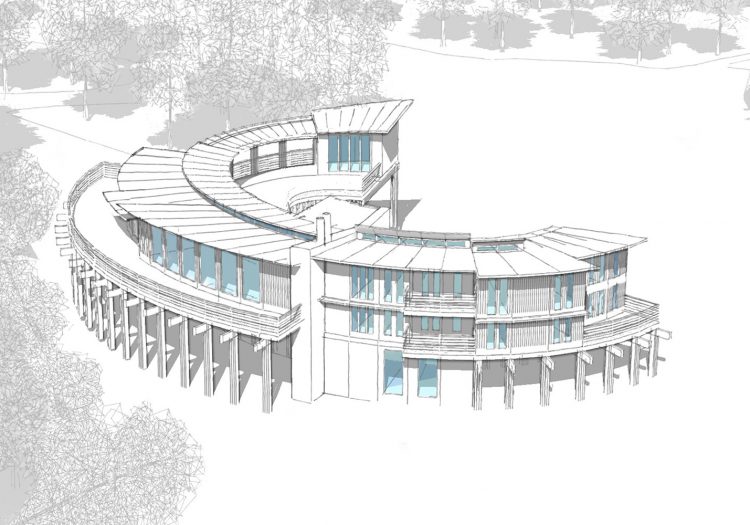
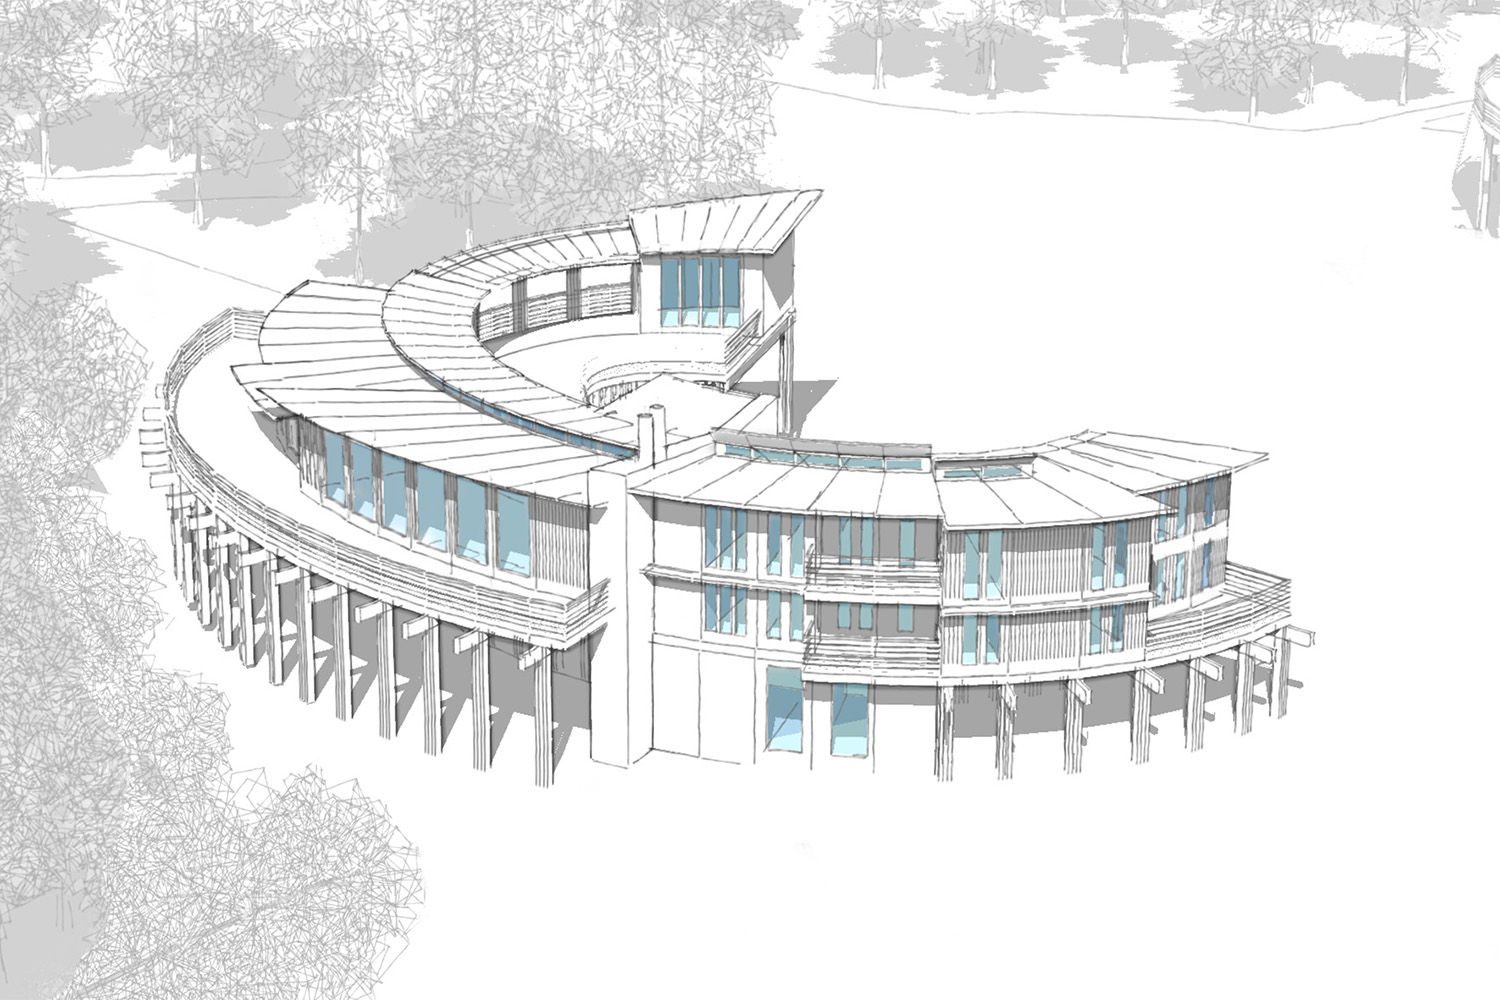
Caldyne Land - House 02 - South East Aerial Sketch
Sketches
Read More
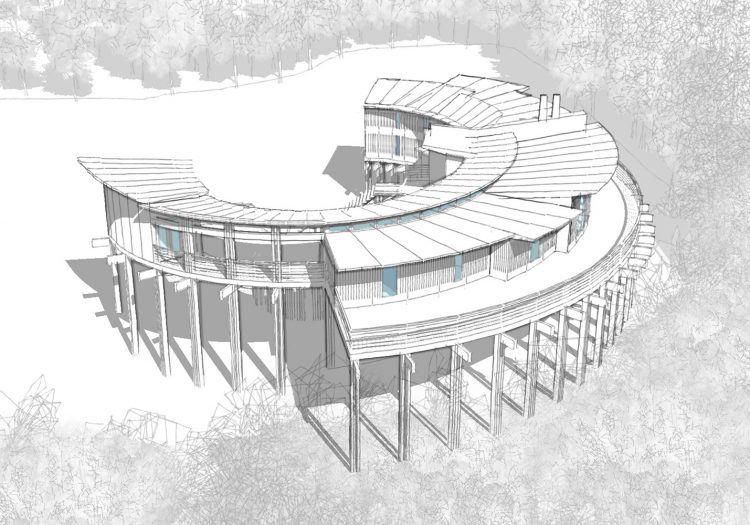
Caldyne Land - House 02 - South West Aerial Sketch
Sketches
Read More
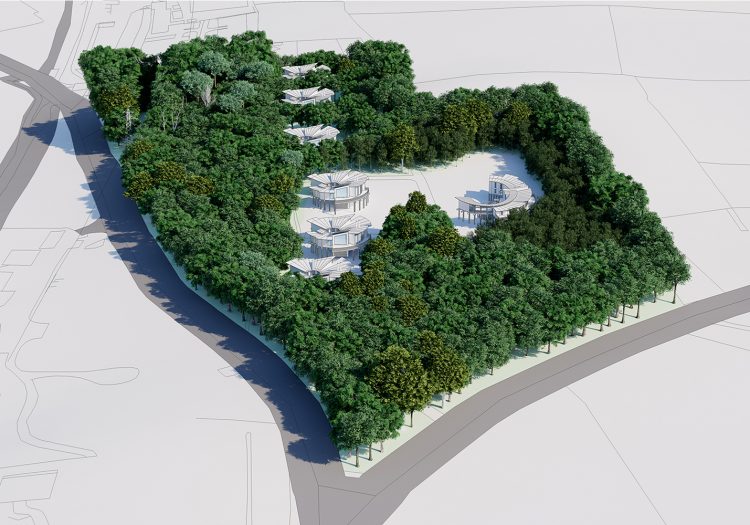
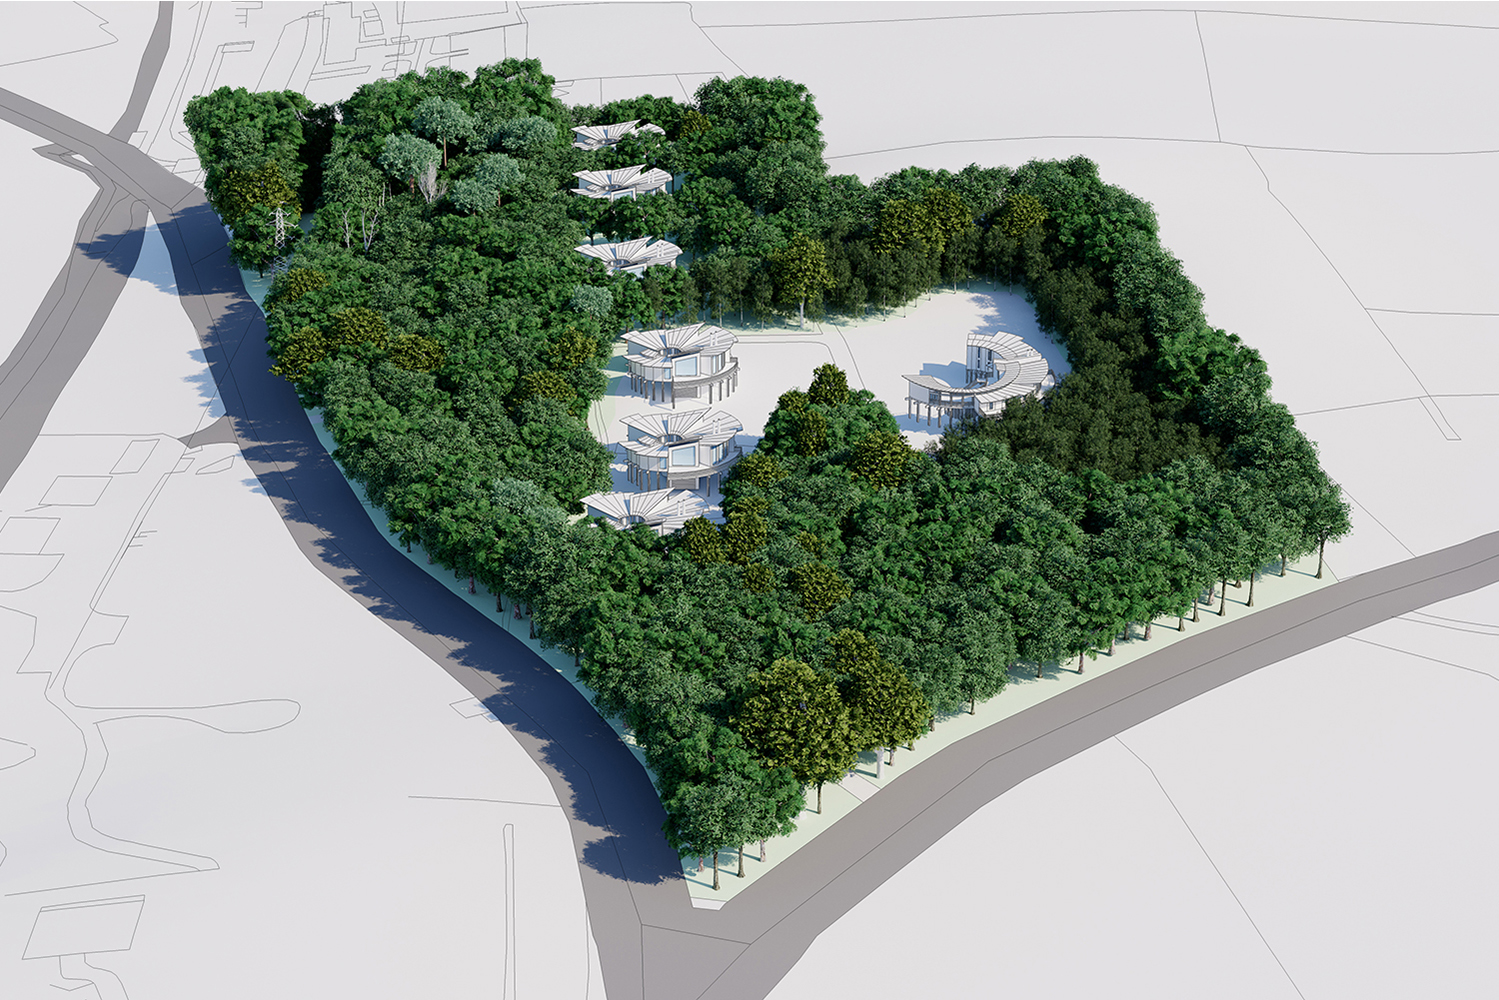
Caldyne Land - Proposed Aerial Render
3D Model
Read More
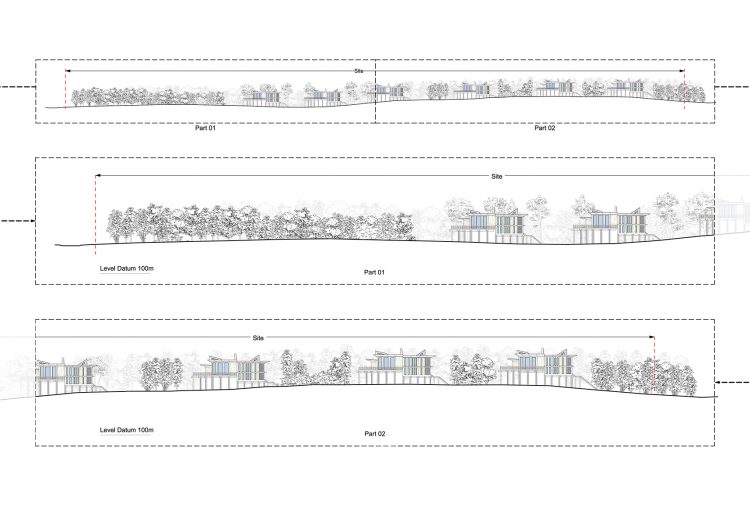
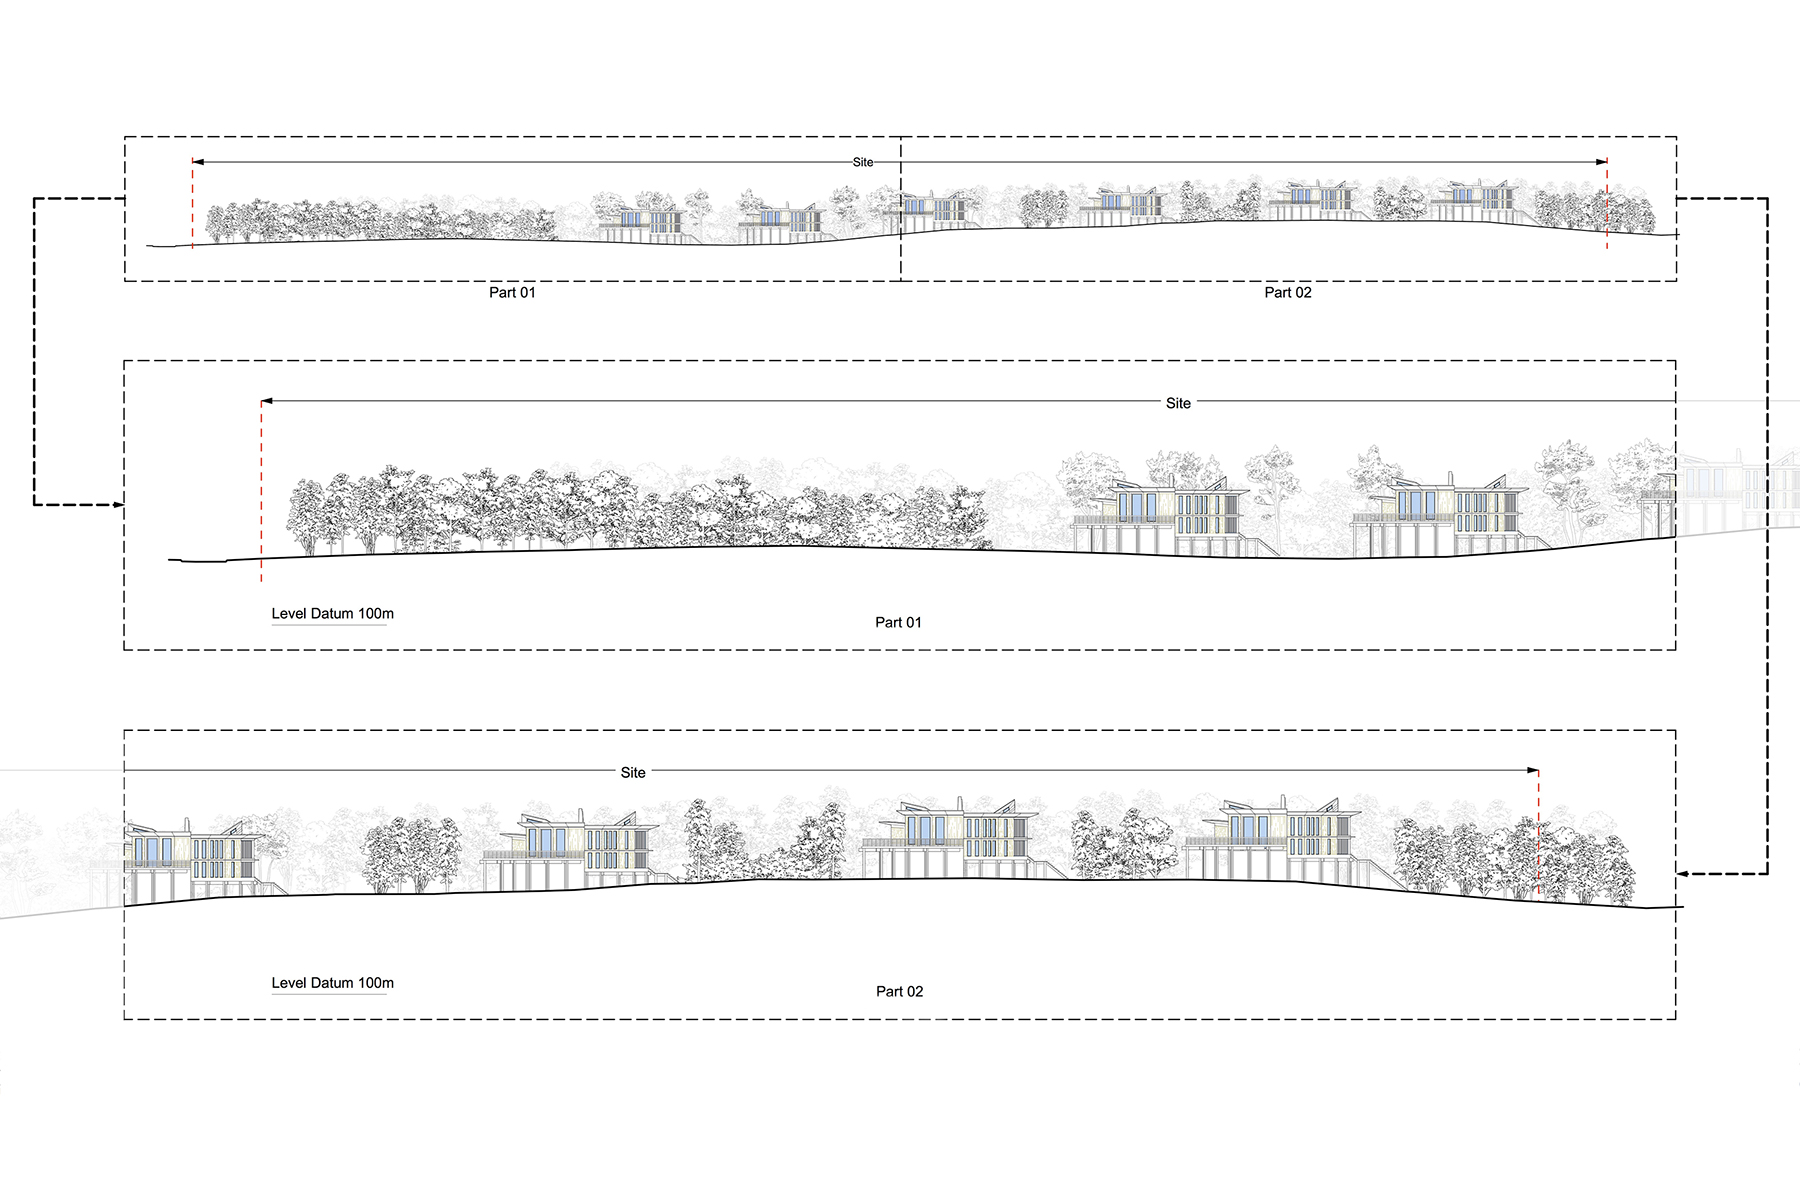
Caldyne Land - Proposed Section 01
Drawing
Read More
Caldyne Land - Proposed Section 02
Drawing
Read More
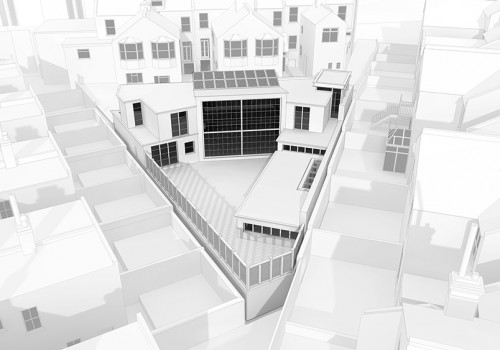
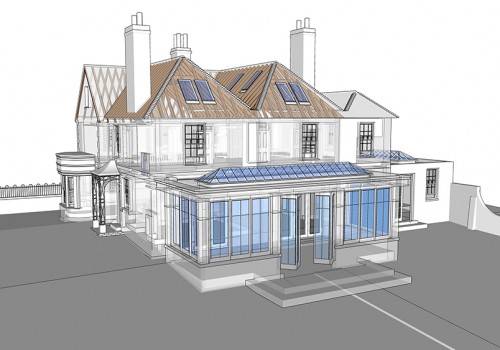
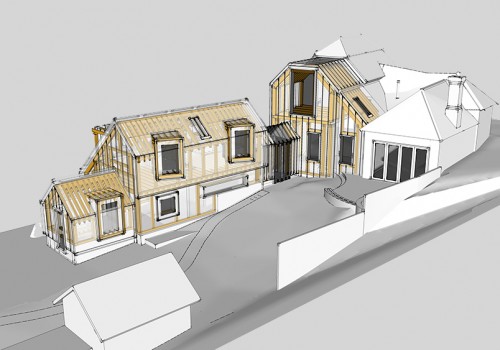
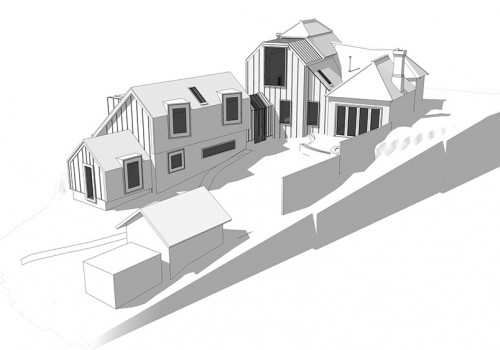
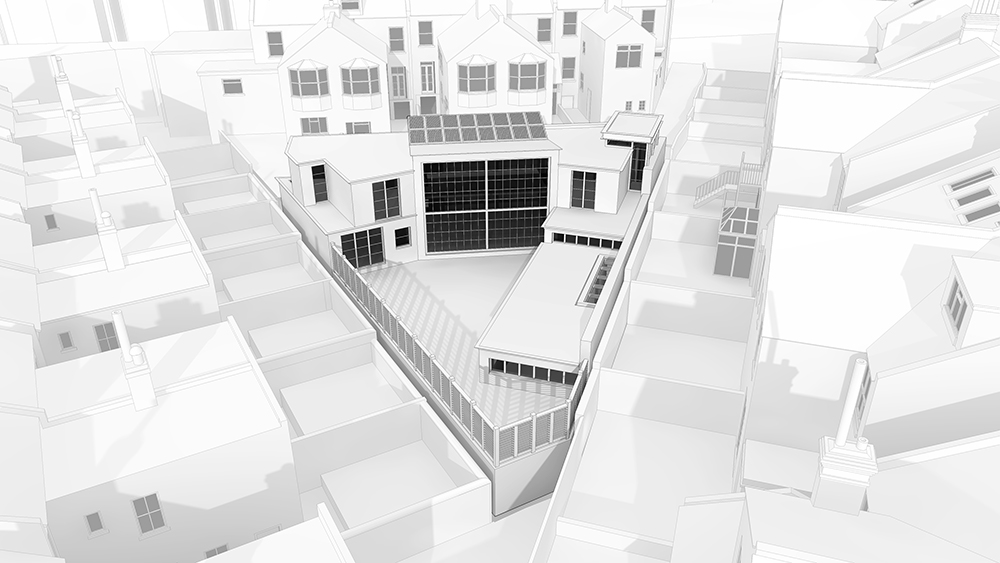
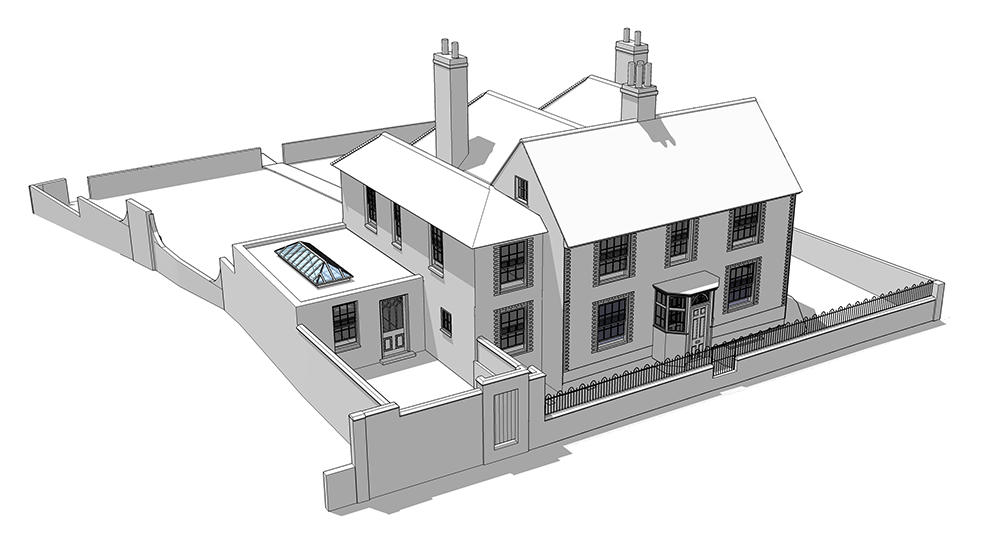
Preston Drove - South
3D Model
Read More
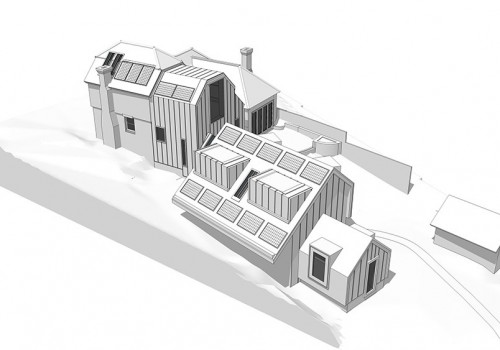
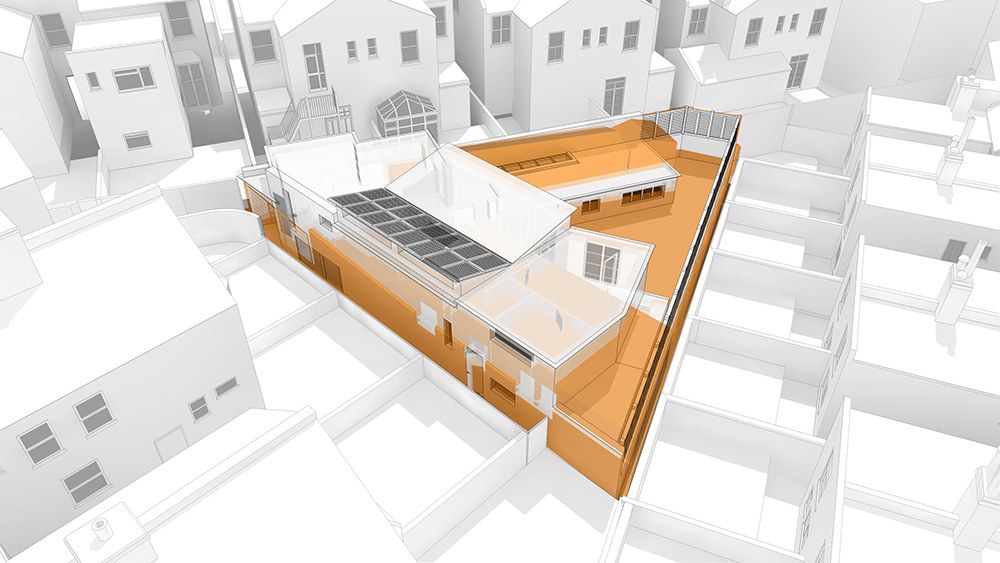
Preston Drove - North
3D Model
Read More
Preston Drove - West
3D Model
Read More
Preston Drove - East
3D Model
Read More
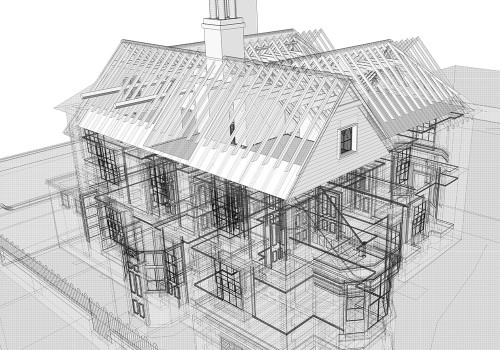
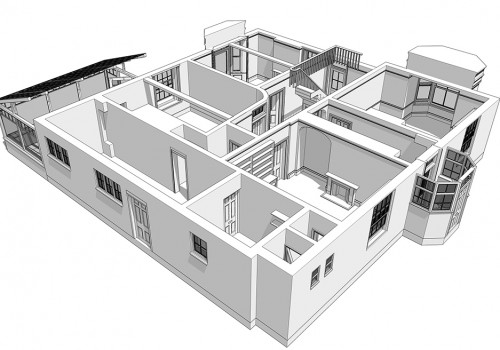
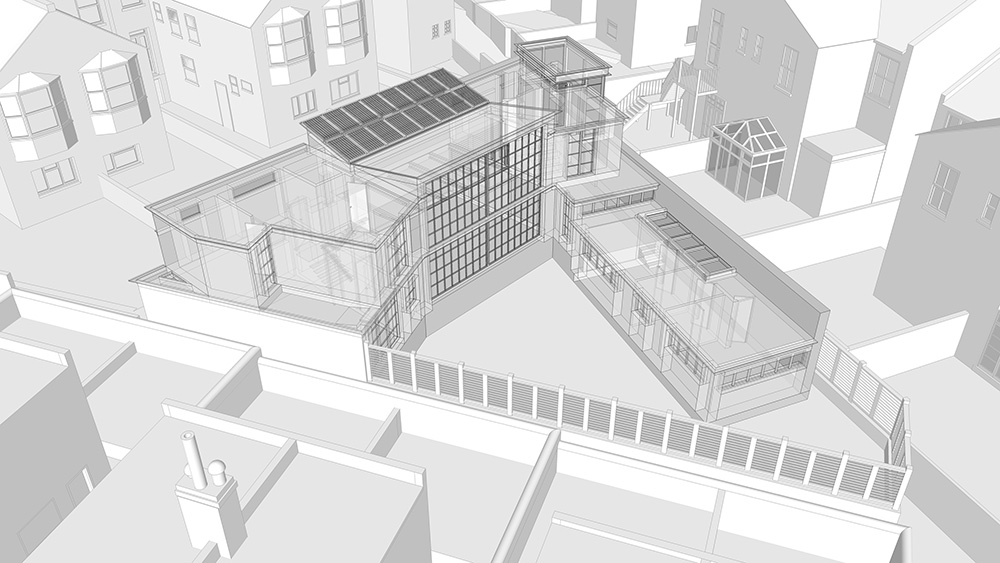
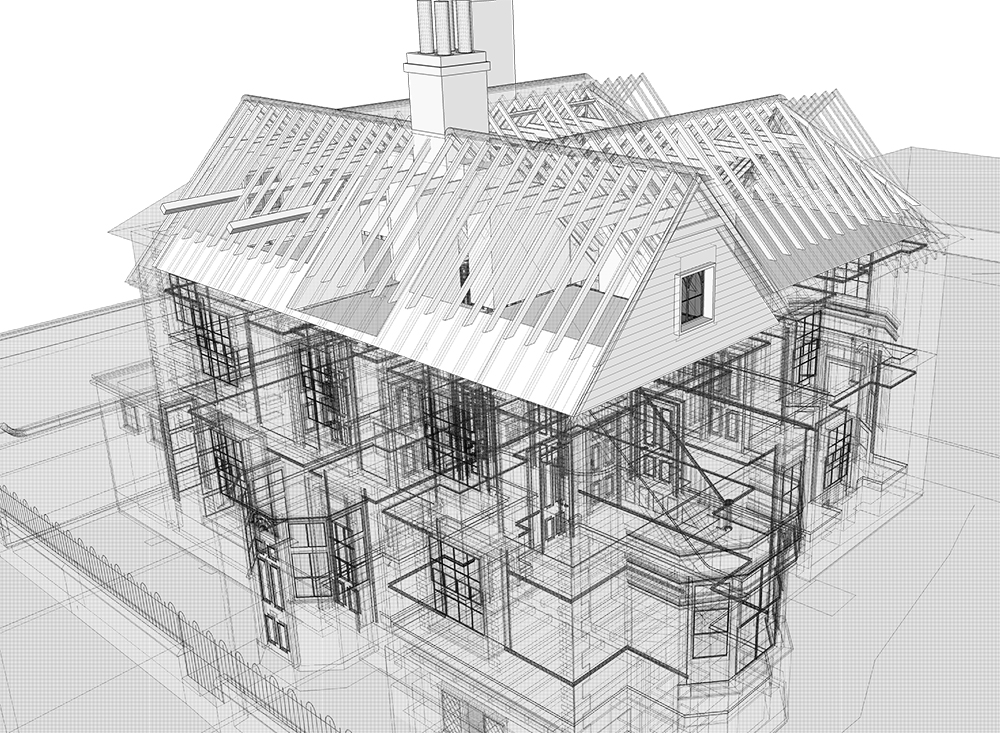
Preston Drove - X-Ray
3D Model
Read More
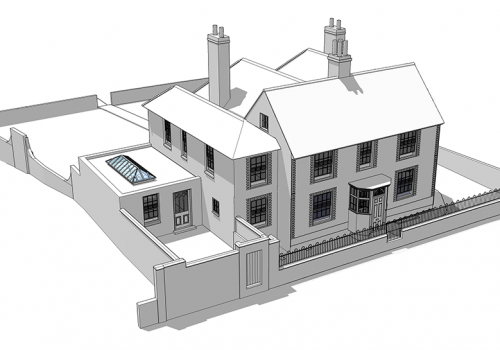
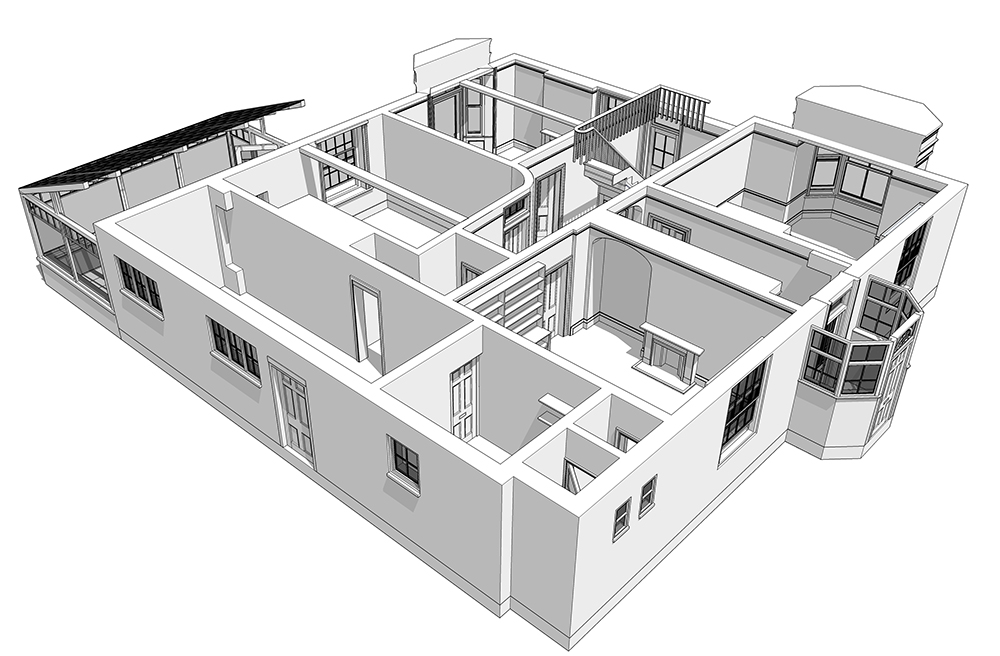
Preston Drove - Existing Buildings North
3D Model
Read More
Preston Drove - Existing Buildings South
3D Model
Read More
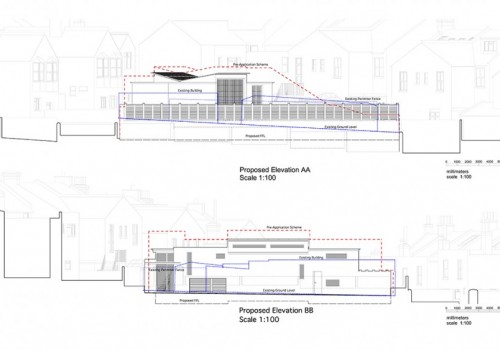
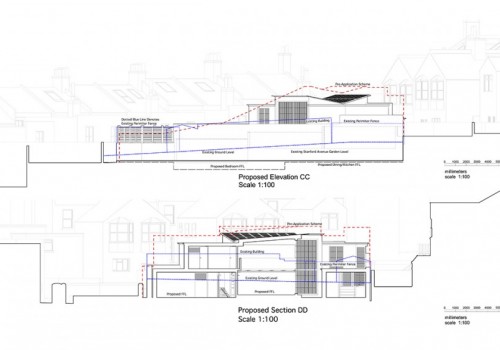
Preston Drove - Elevations
Drawing
Read More
Preston Drove - Elevation And Section
Drawing
Read More
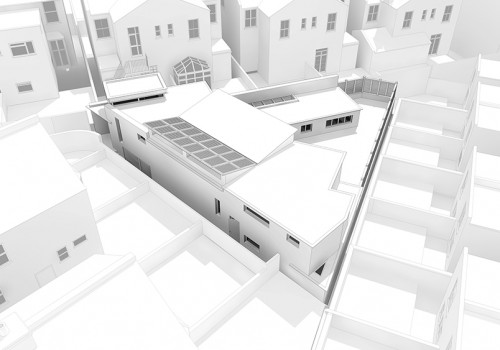
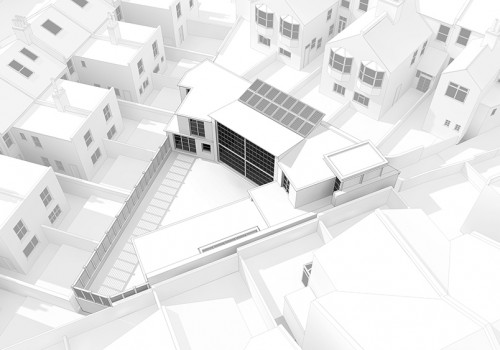
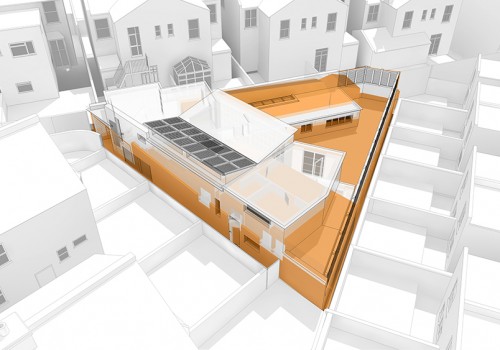
Cotterlings - South Proposal
3D Model
Read More
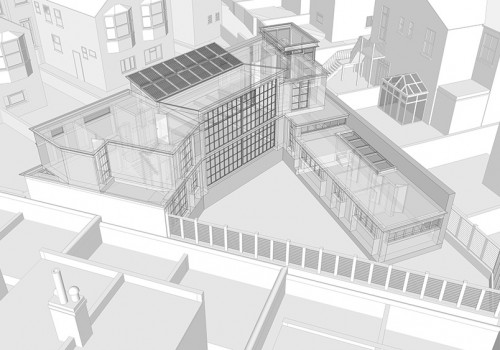
Cotterlings - South X-Ray
3D Model
Read More
Cotterlings - North X-Ray
3D Model
Read More
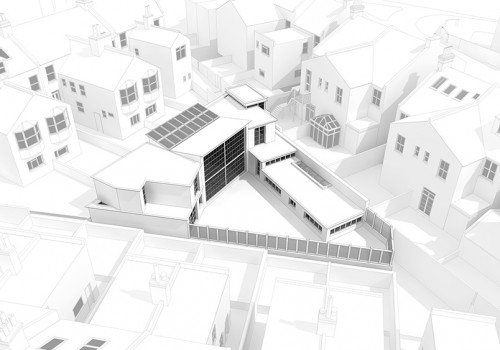
Cotterlings - North
3D Model
Read More
Cotterlings - South
3D Model
Read More
Cotterlings - Ground Floor Internal Details
3D Model
Read More
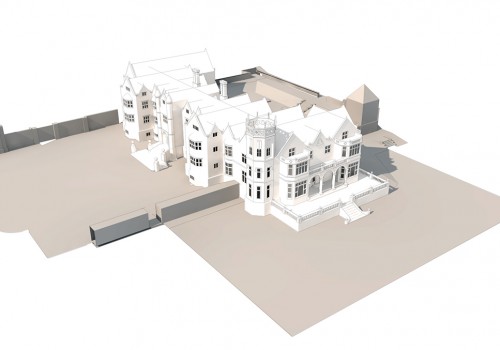
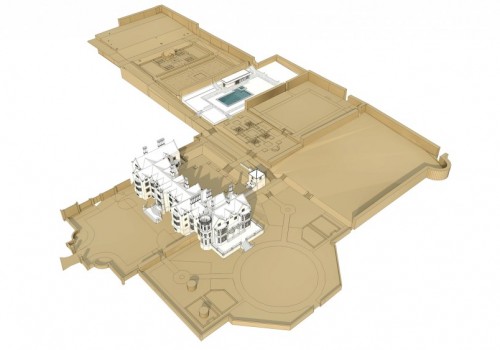
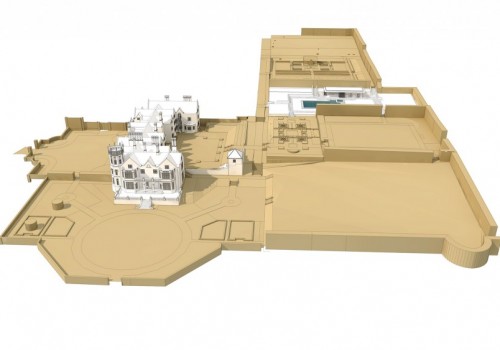
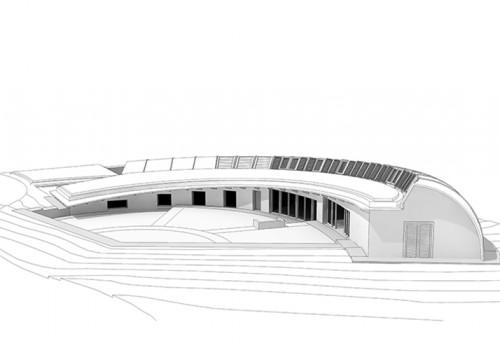
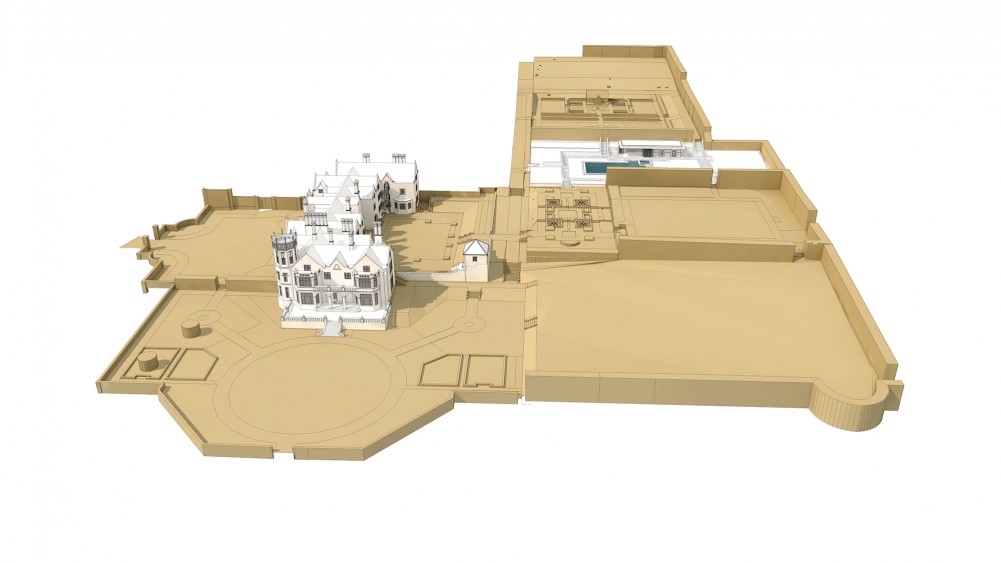
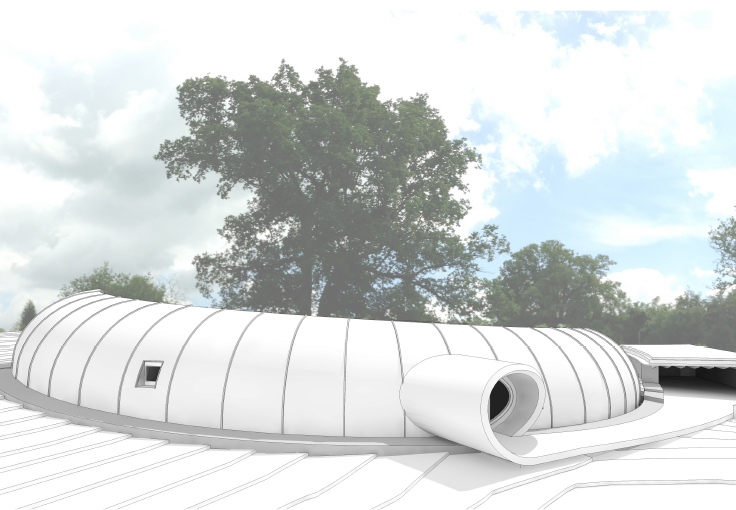
Paxhill - Detailed Model
3D Model
Read More
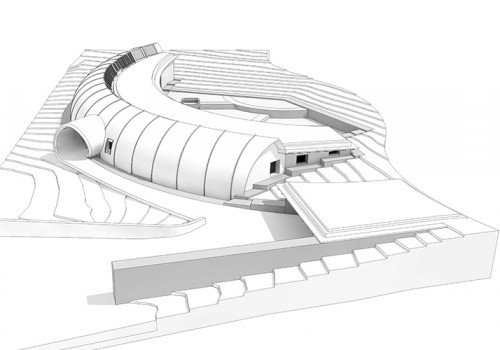
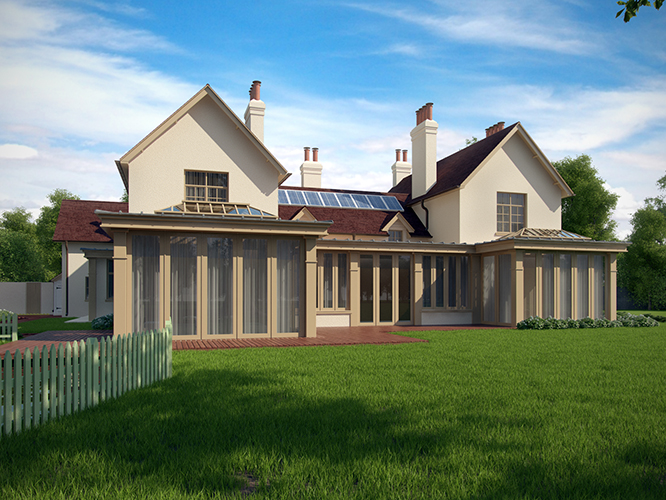
Paxhill - South West Overview
3D Model
Read More
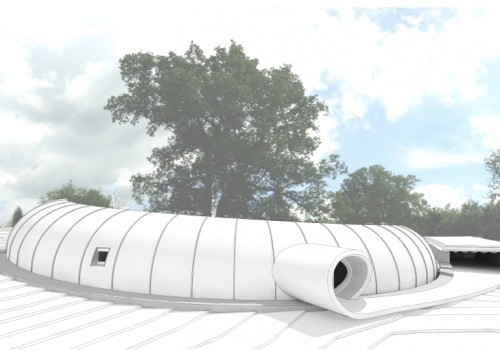
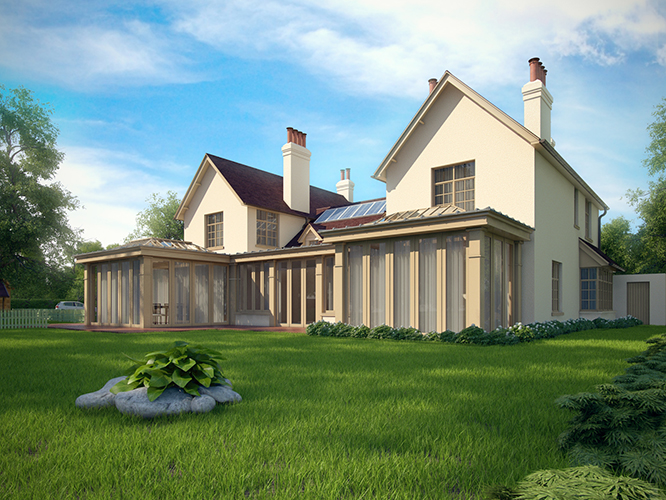
Paxhill - South Overview
3D Model
Read More
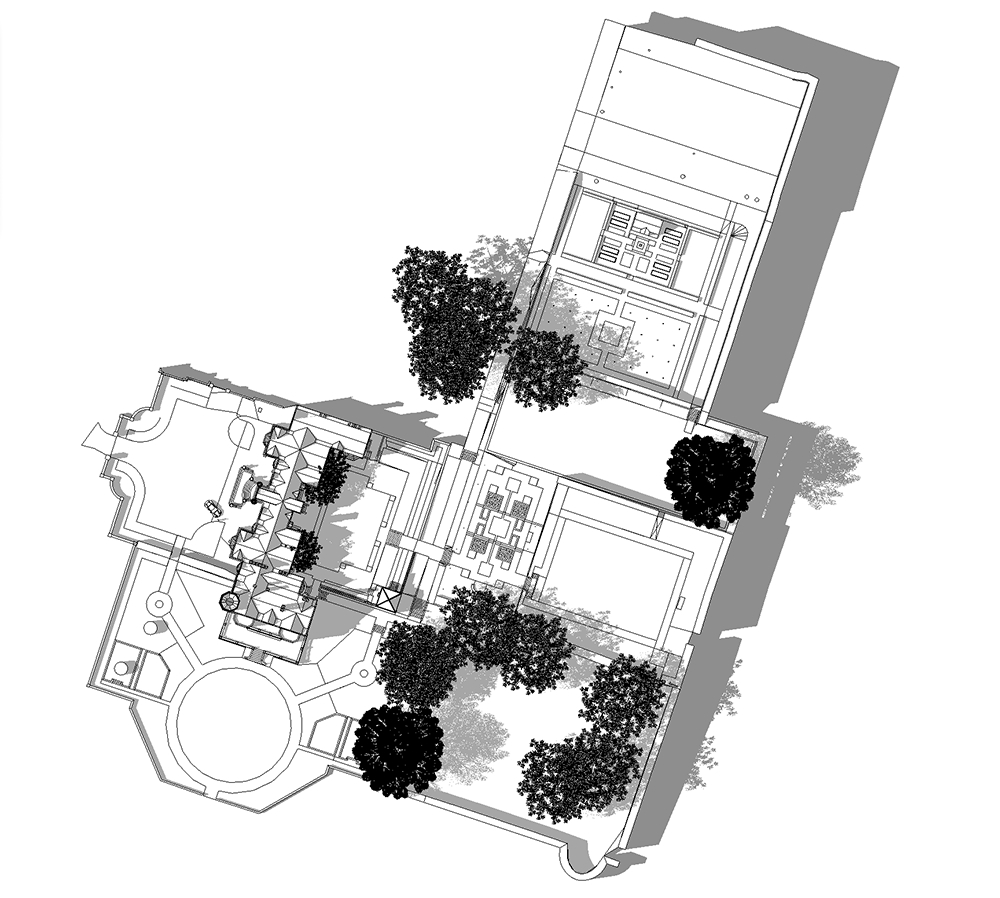
Paxhill - Solar Study
Drawing
Read More
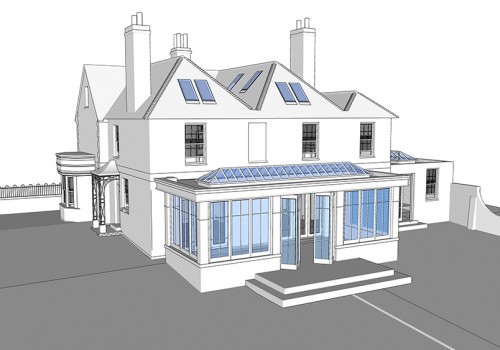
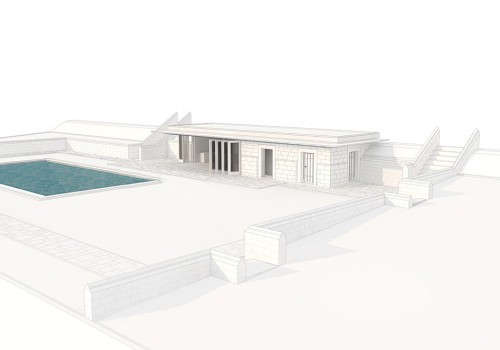
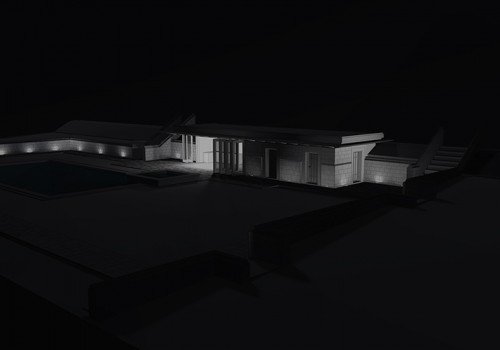
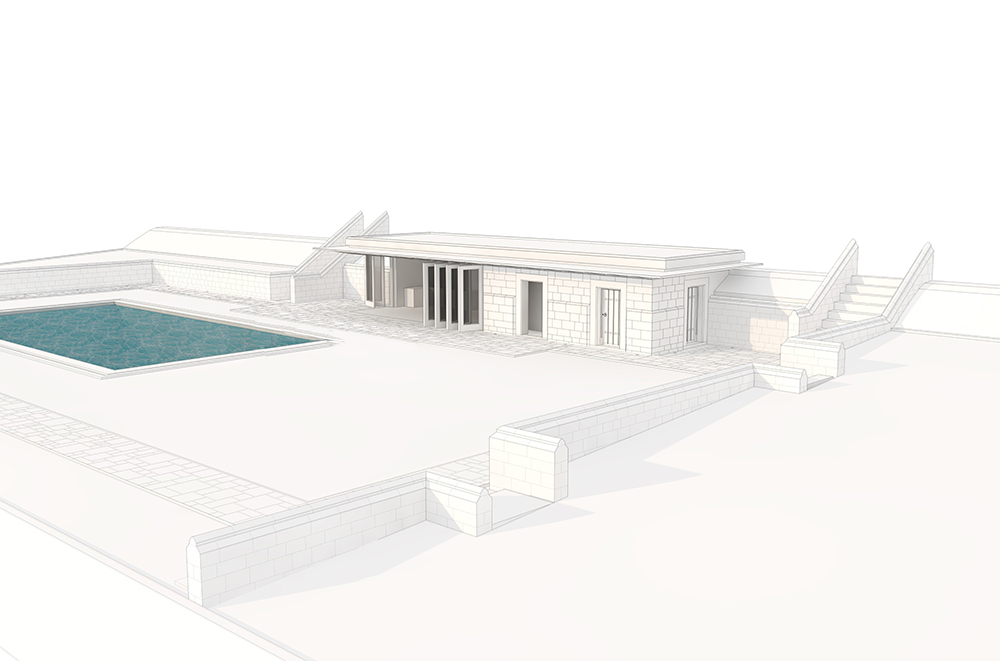
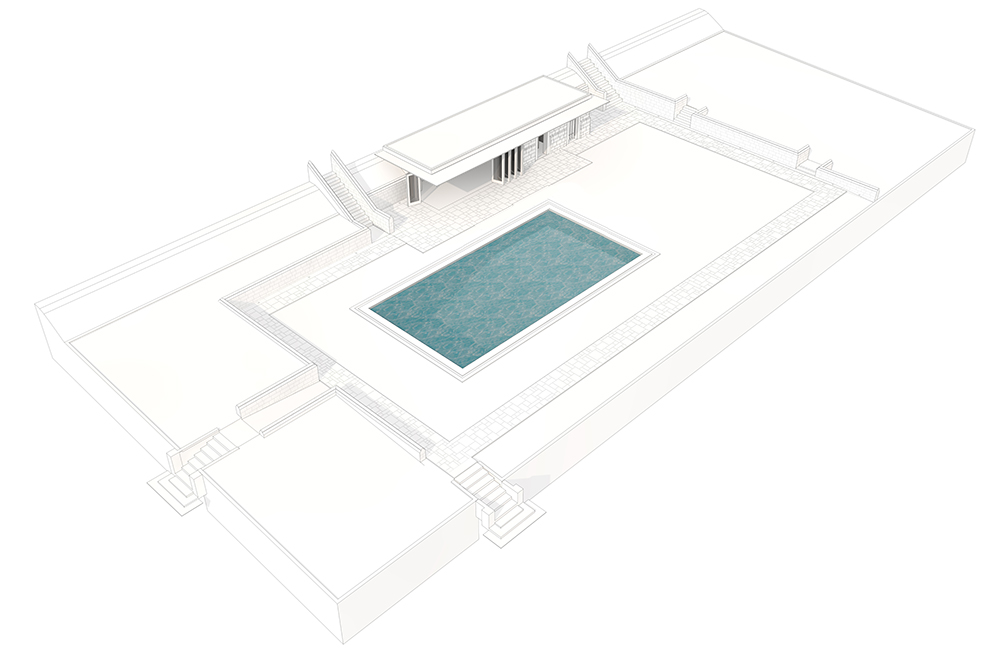
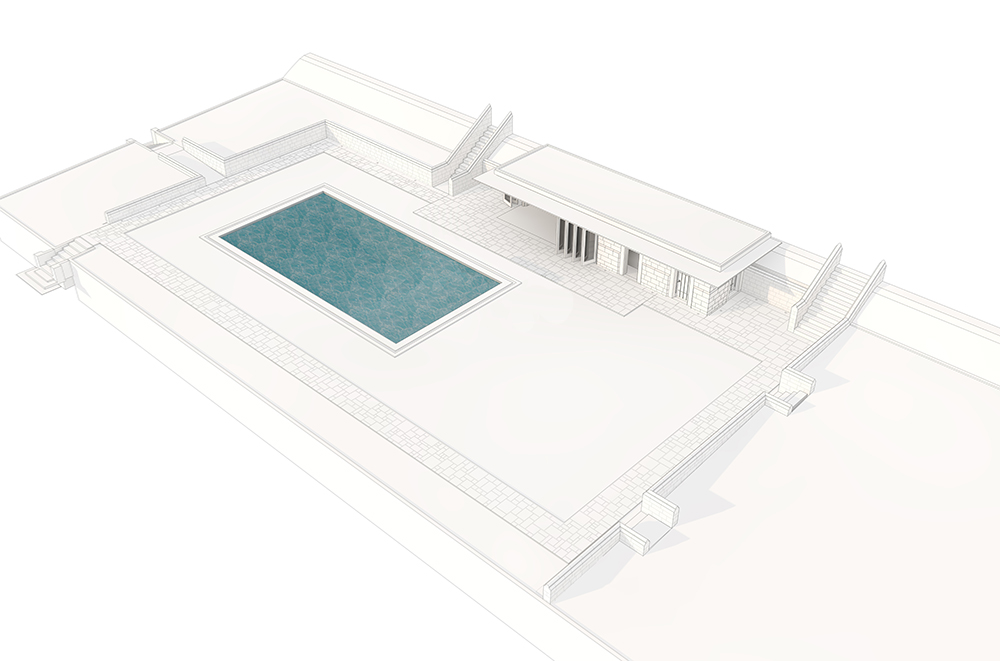
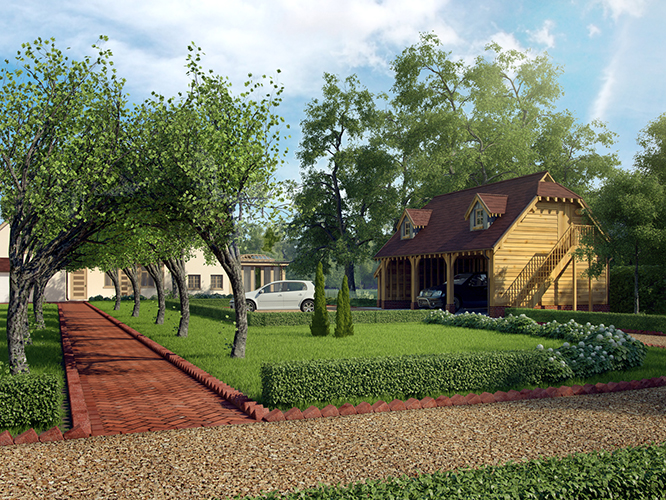
Paxhill Poolhouse - Eye Level Day
3D Model
Read More
Paxhill Poolhouse - Eye Level - Night
3D Model
Read More
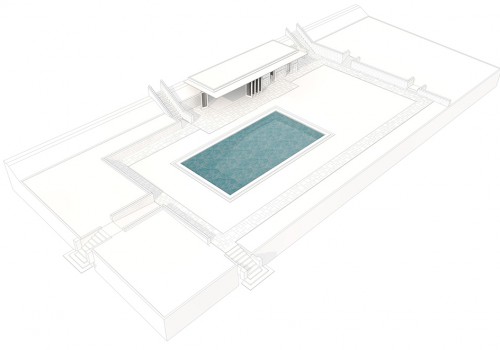
Paxhill Poolhouse - South West - Day
3D Model
Read More
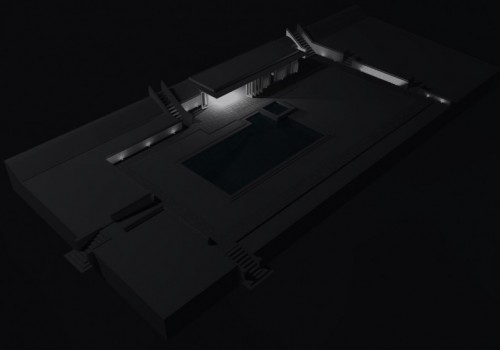
Paxhill Poolhouse - South West - Night
3D Model
Read More
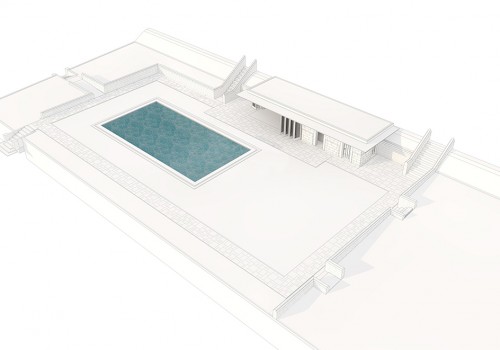
Paxhill Poolhouse - South East
3D Model
Read More
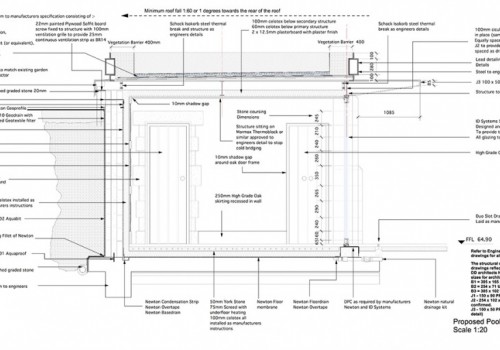
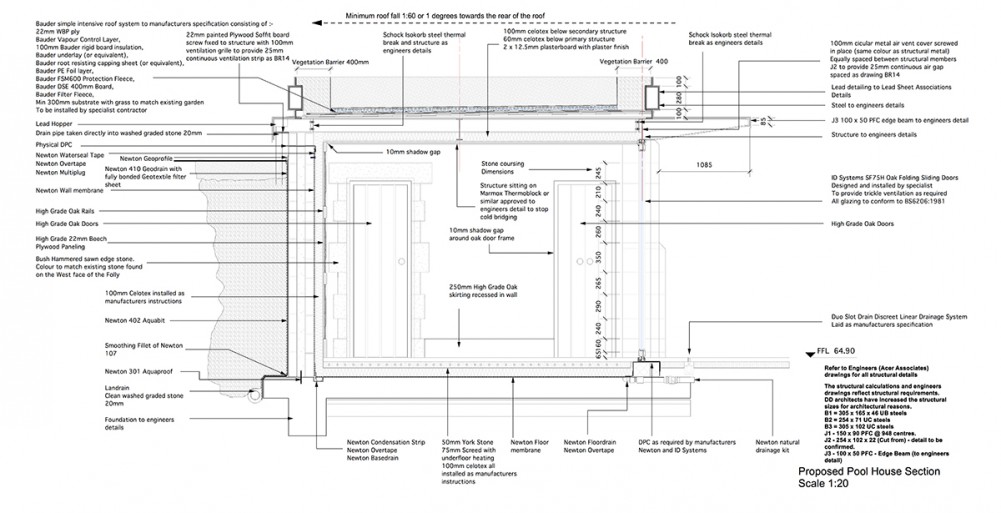
Paxhill Poolhouse - Poolhouse Detail Section
Drawing
Read More
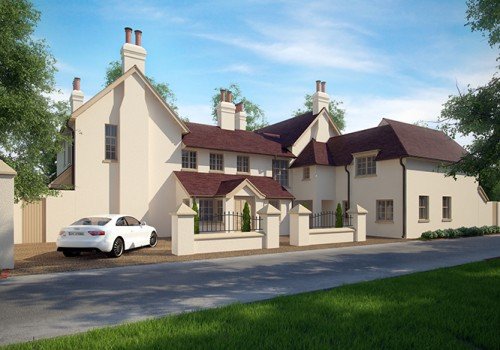
Sleepy Hollow - Aerial Overview
3D Model
Read More
Sleepy Hollow - Eye Level - Entrance
3D Model
Read More
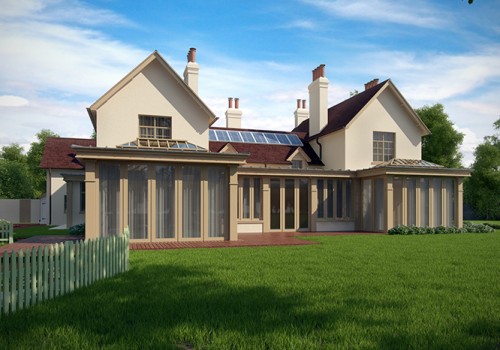
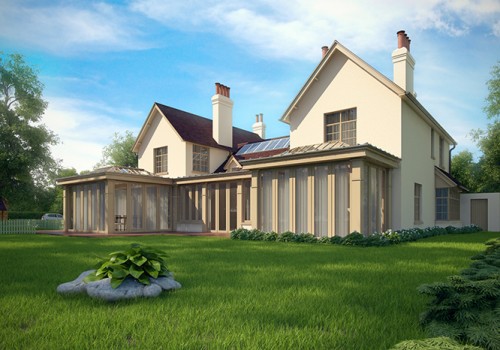
Sleepy Hollow - South
3D Model
Read More
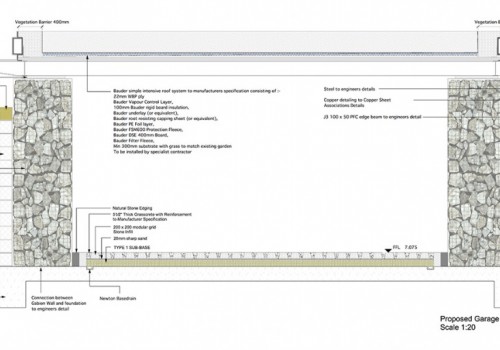
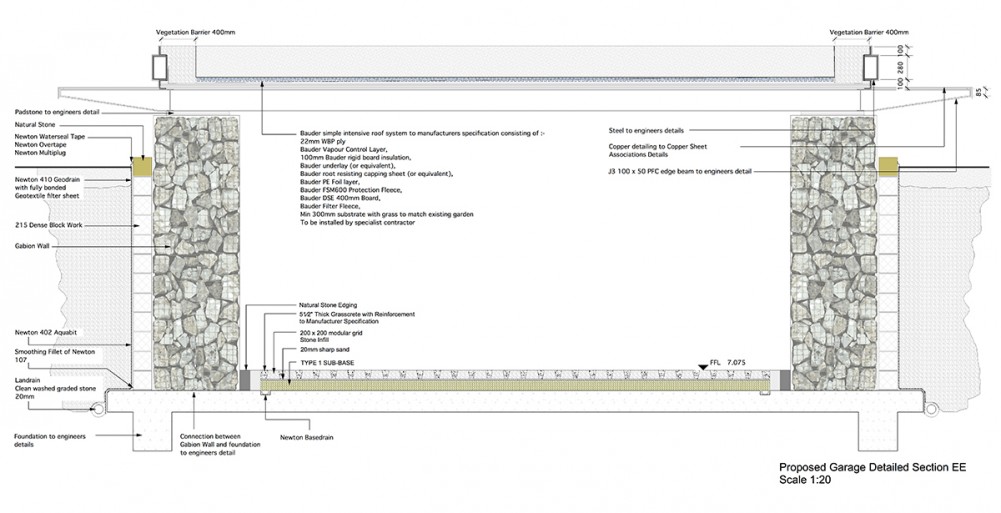
Sleepy Hollow - Garage Detail Section
Drawing
Read More
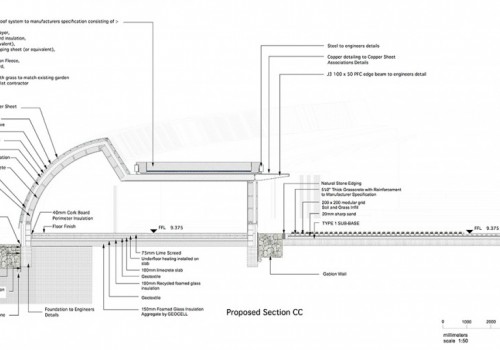
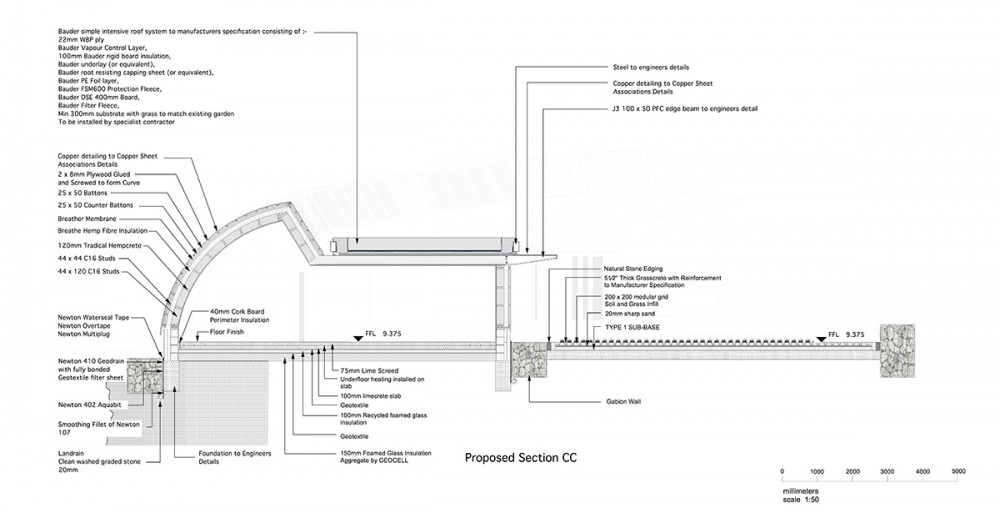
Sleepy Hollow - Detail Section
Drawing
Read More
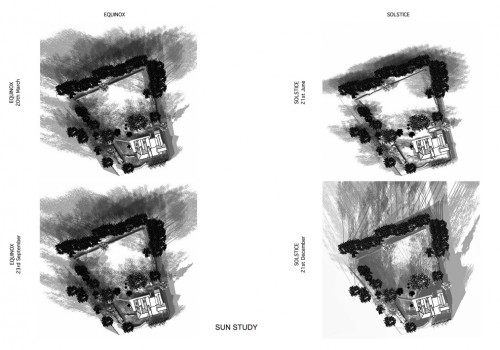
Sleepy Hollow - Solar Studies
Drawing
Read More
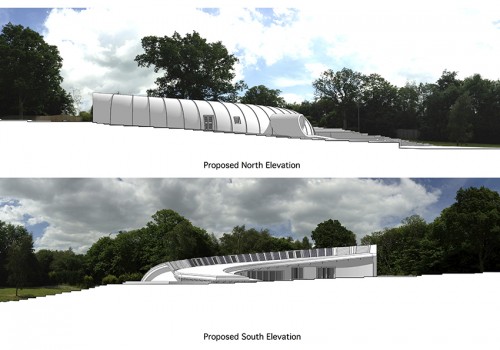
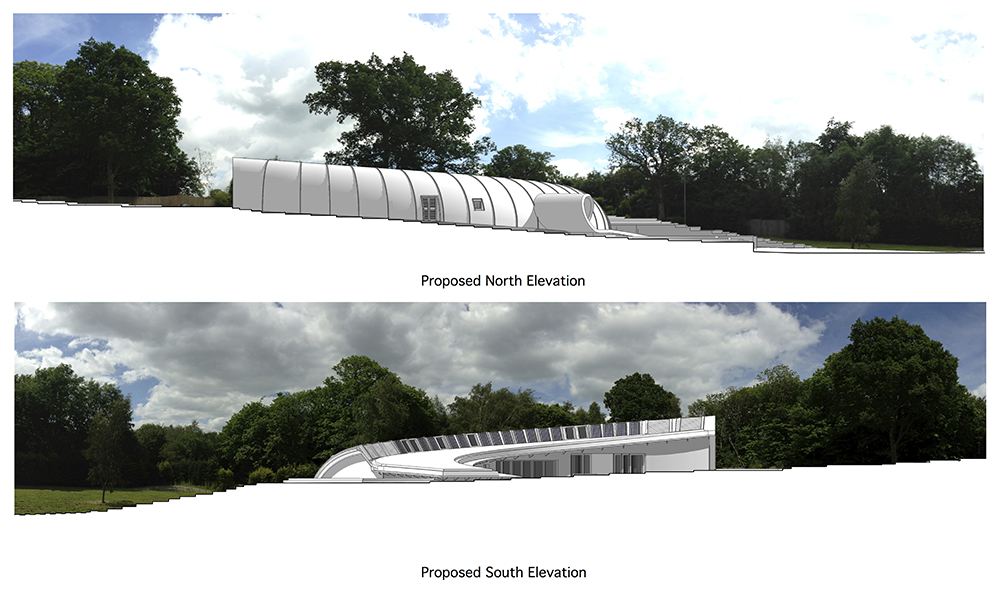
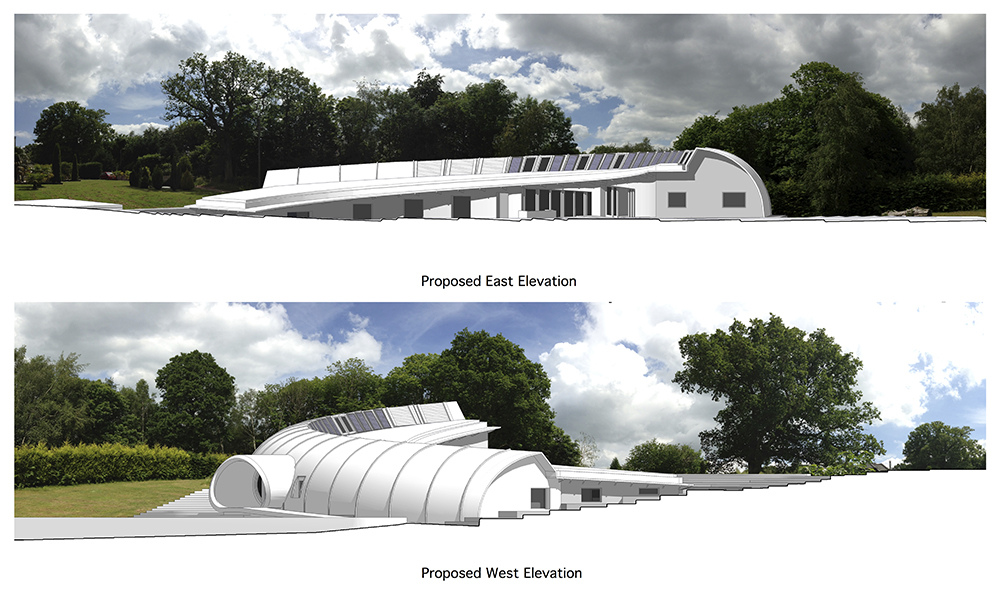
Sleepy Hollow - Elevations 1
Drawing
Read More
Sleepy Hollow - Elevations 2
Drawing
Read More
Downside Meadows - Artists Impression
3D Model
Read More
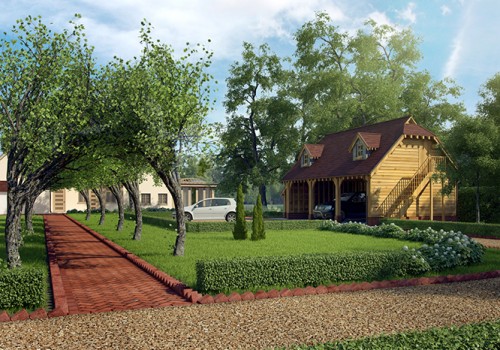
Coach House - X-Ray
3D Model
Read More
Coach House - As Built Model South
3D Model
Read More
Coach House - As Built Model North
3D Model
Read More
Coach House - Detail Sections 1
Drawing
Read More
Coach House - Detail Sections 2
Drawing
Read More
Downside Meadow - Overview
Model
Read More
Downside Meadow - Close Up 02
Model
Read More
Downside Meadow - Close Up 03
Model
Read More
Bare Court - South West
Model
Read More
Bare Court - West
Model
Read More
Bare Court - North West
Model
Read More
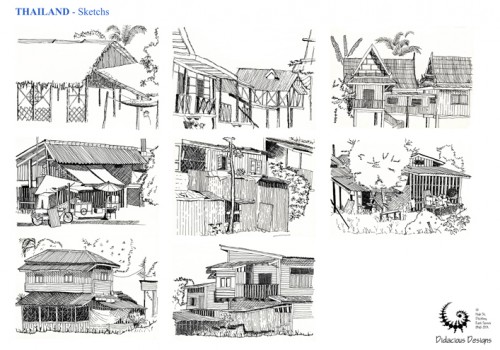
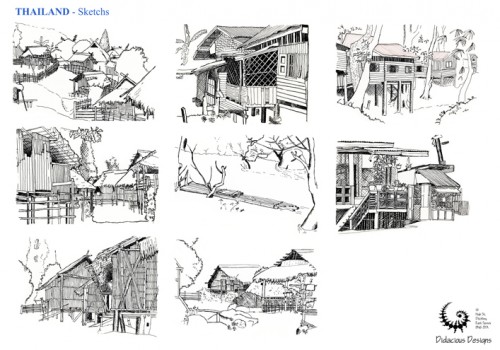
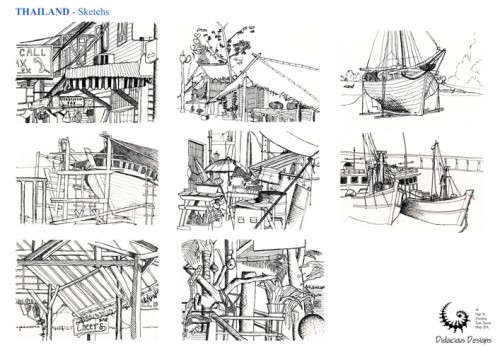
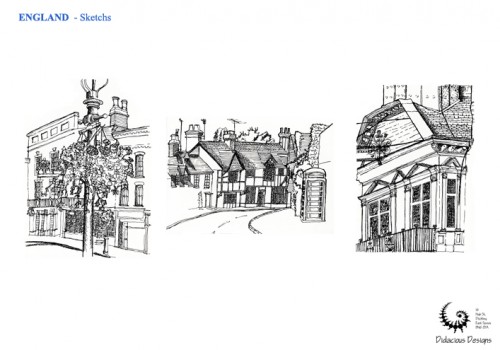
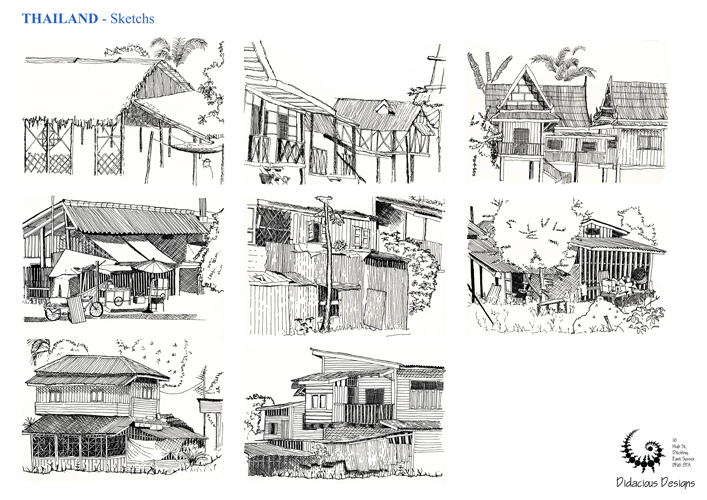
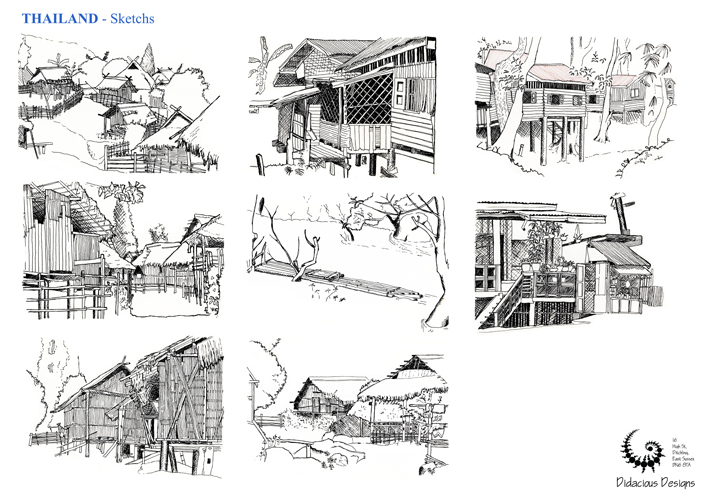
Sketches From Around The World 01
Sketches
Read More
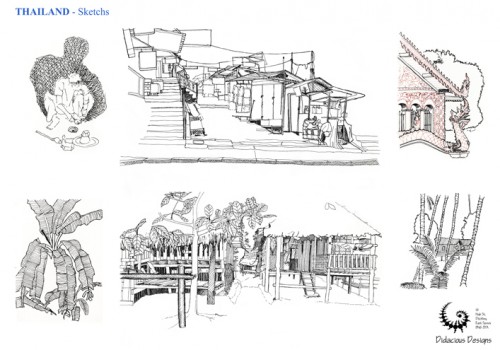
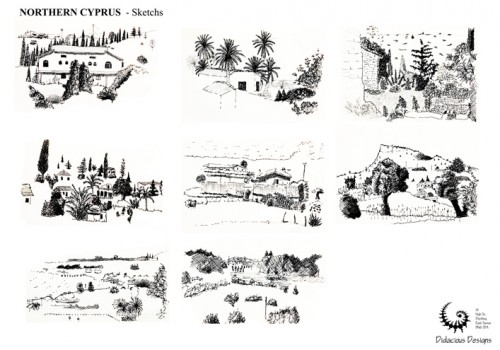
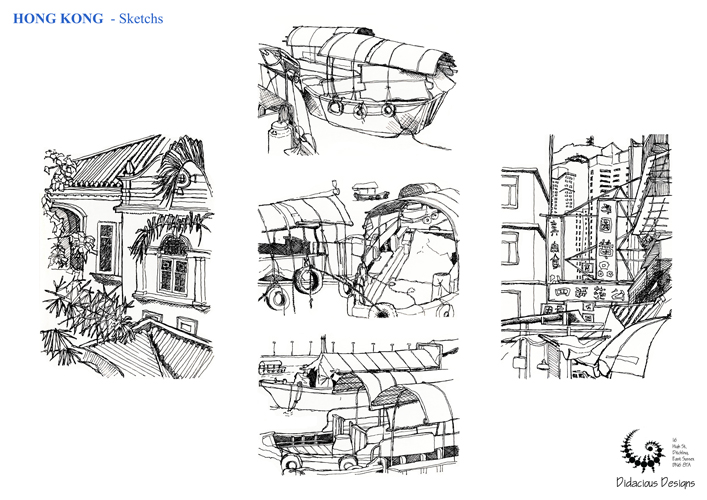
Sketches From Around The World 02
Sketches
Read More
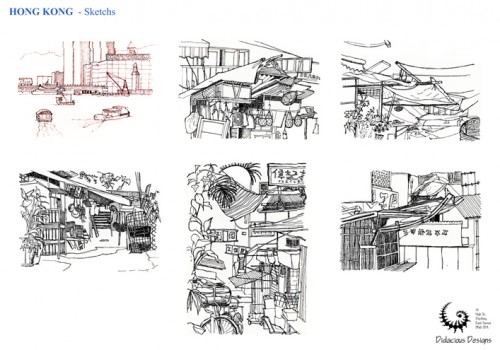
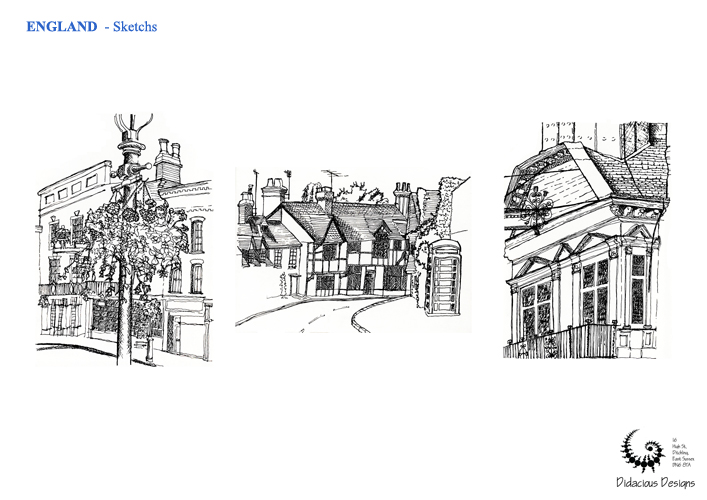
Sketches From Around The World 03
Sketches
Read More
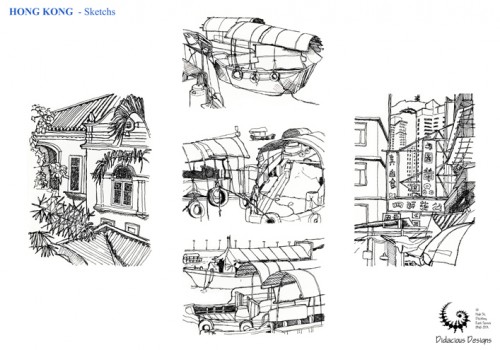
Sketches From Around The World 04
Sketches
Read More
Sketches From Around The World 05
Sketches
Read More
Sketches From Around The World 06
Sketches
Read More
Sketches From Around The World 07
Sketches
Read More
Sketches From Around The World 08
Sketches
Read More
Sketches From Around The World 09
Sketches
Read More
Sketches From Around The World 10
Sketches
Read More
Bowater Road - Cycle Link
Read More
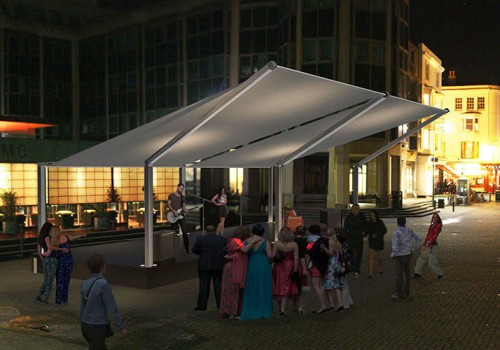
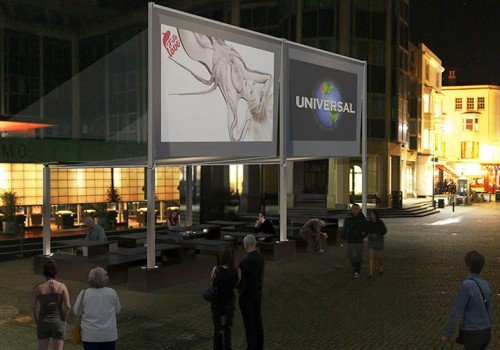
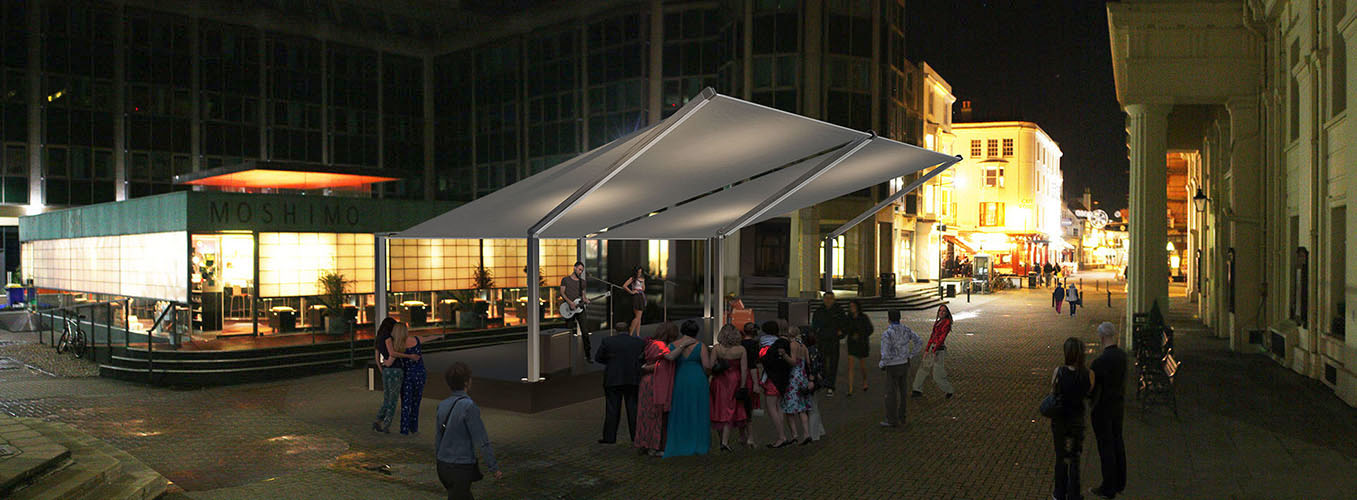
Greenwhich Town Centre
Read More
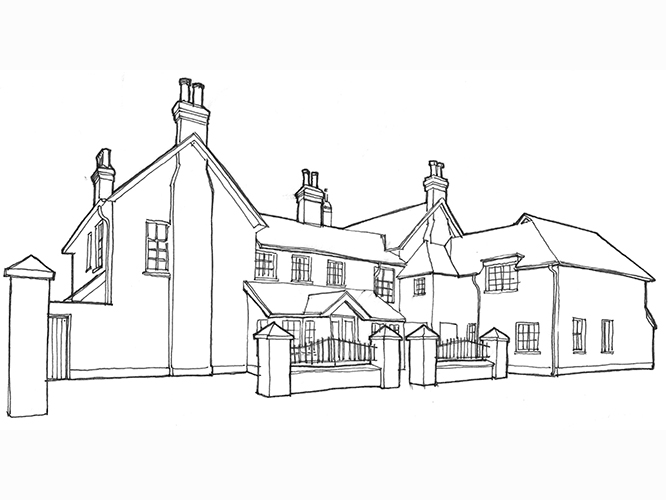
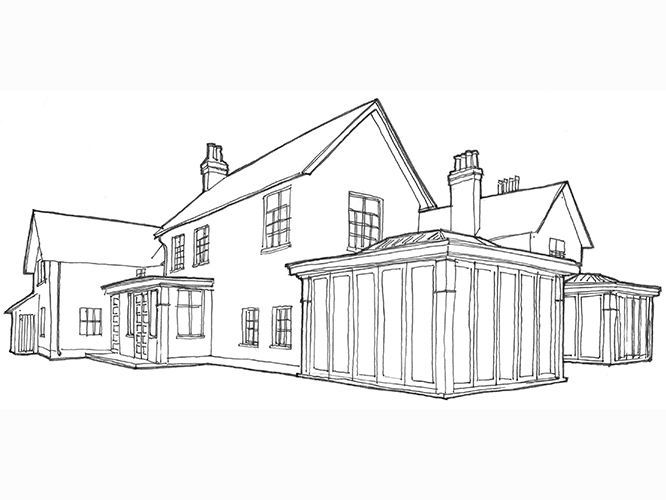
Wardley Cottage - Photoreal 01
Read More
Wardley Cottage - Photoreal 02
Read More
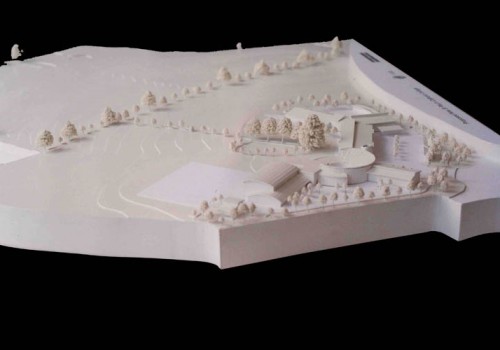
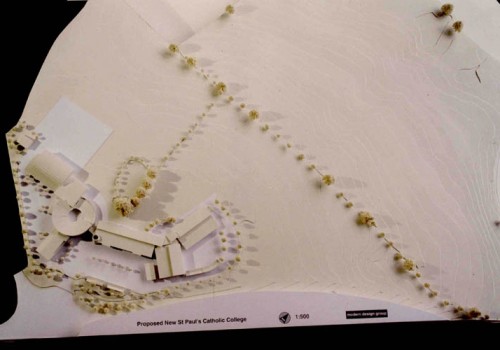
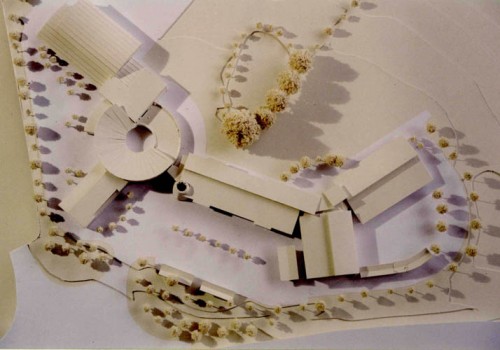
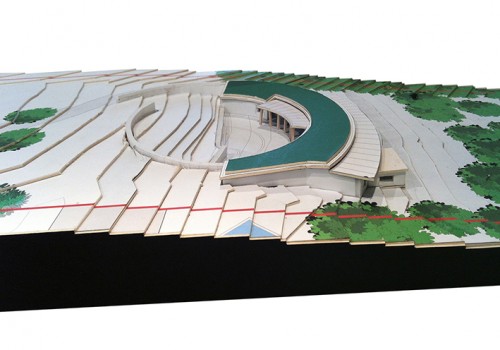
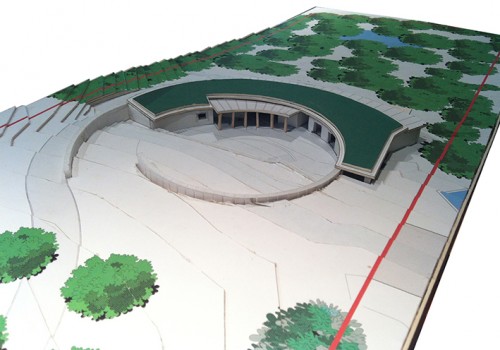
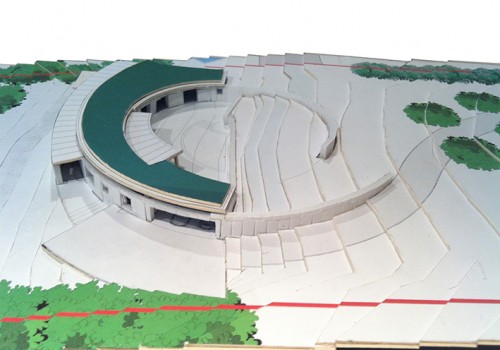
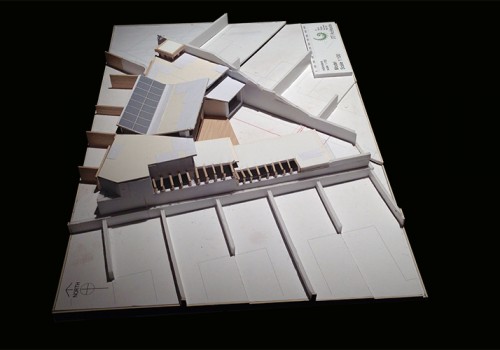
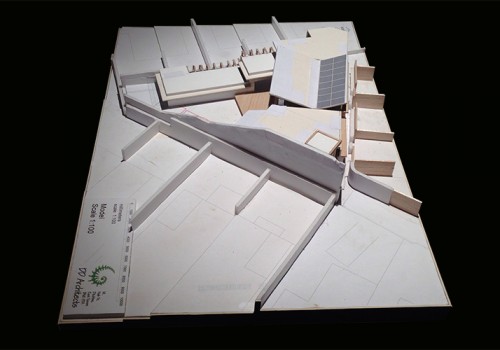
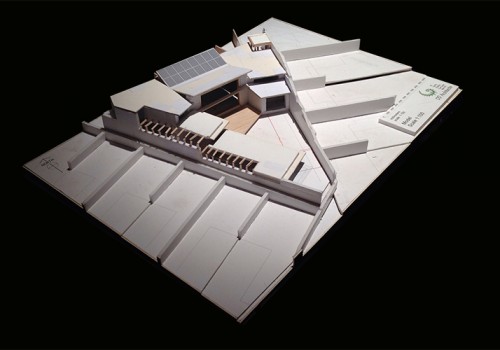
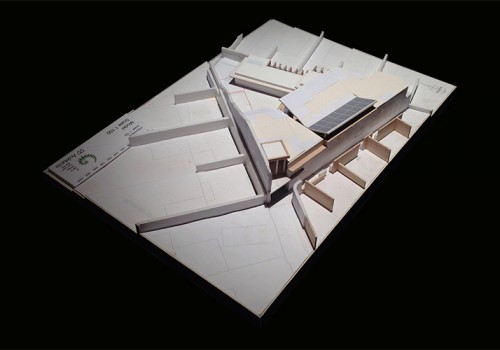
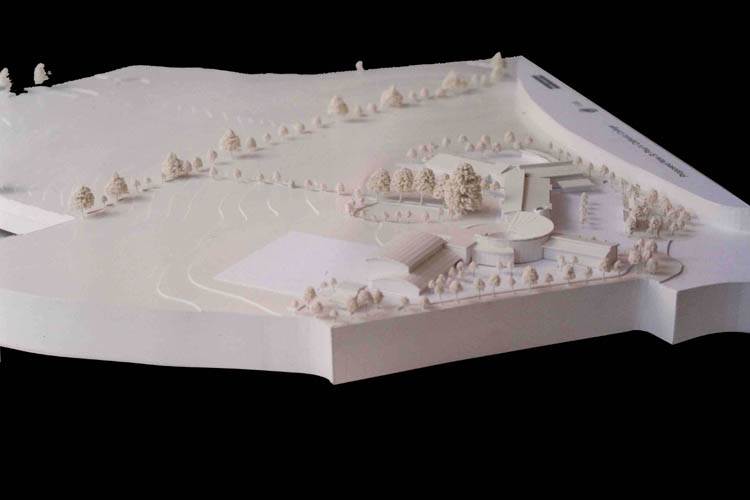
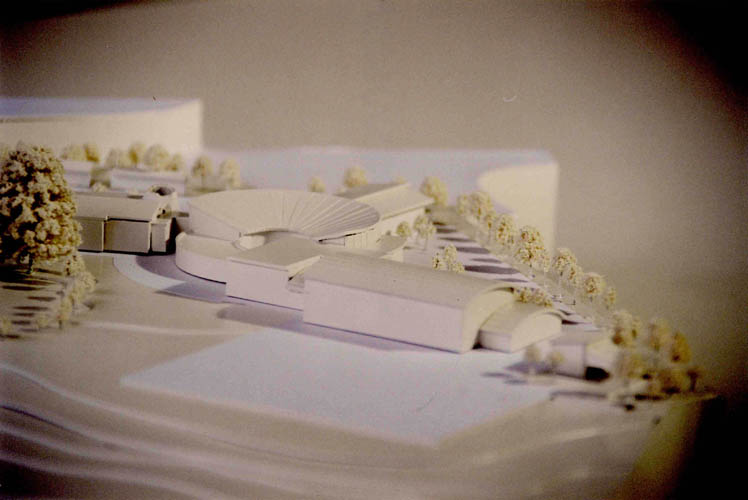
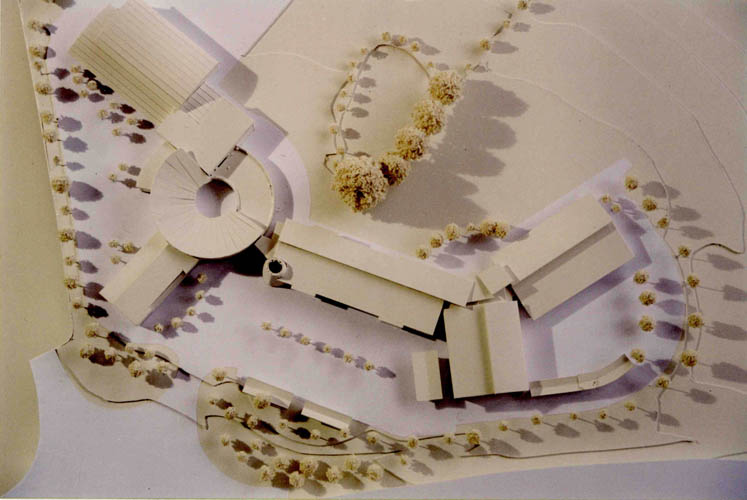
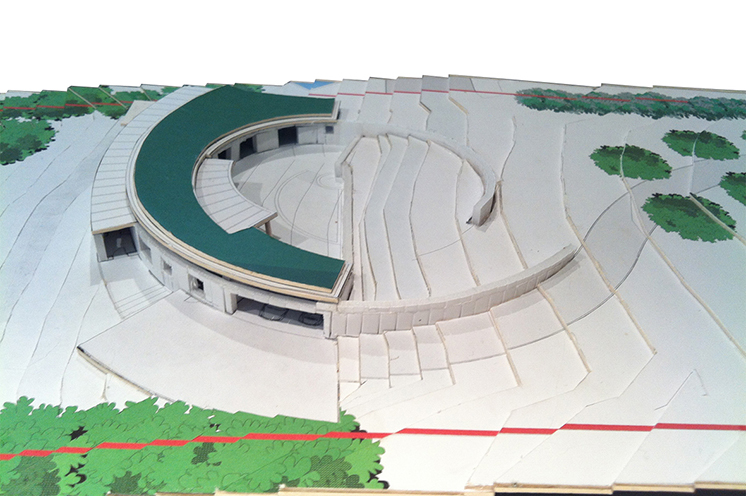
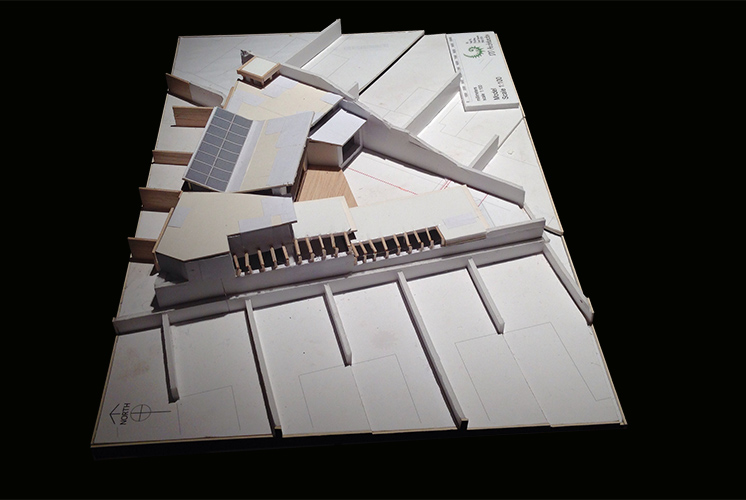
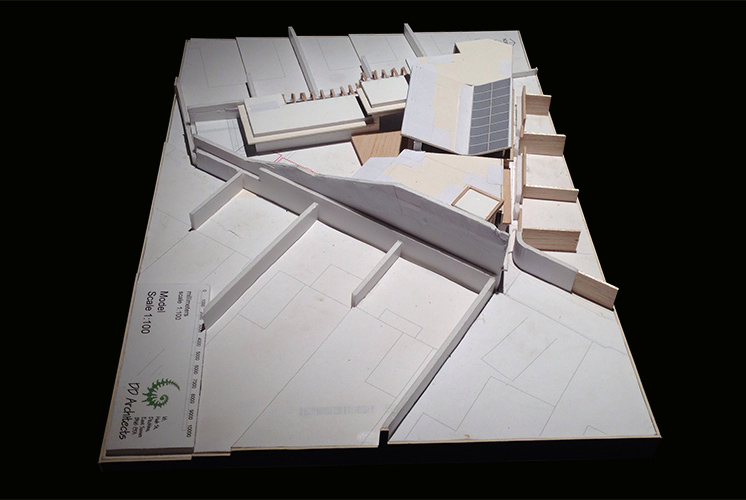
St Pauls School - Model Overview
Model
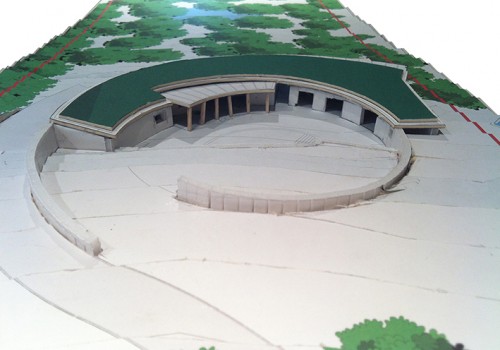
Read More
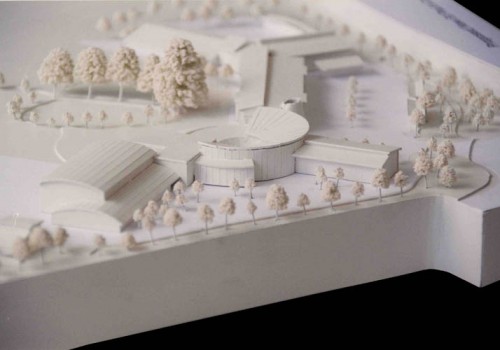
St Pauls School - Model Close Up 01
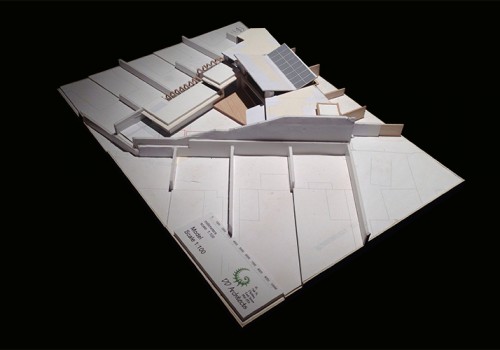
Model
Read More
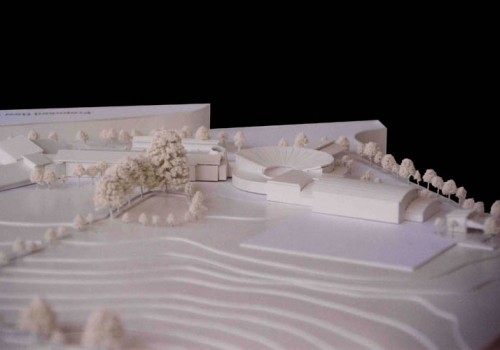
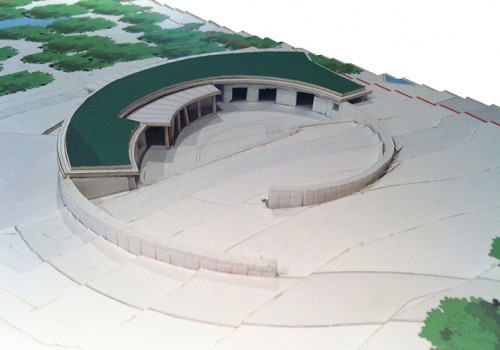
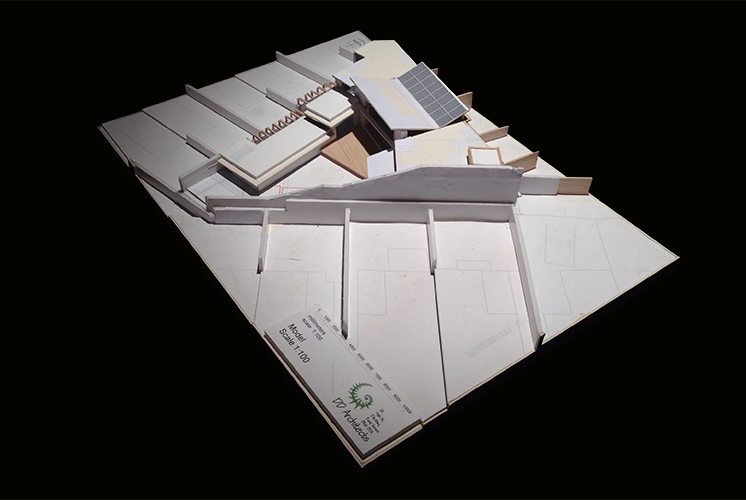
St Pauls School - Model Close Up 02
Model
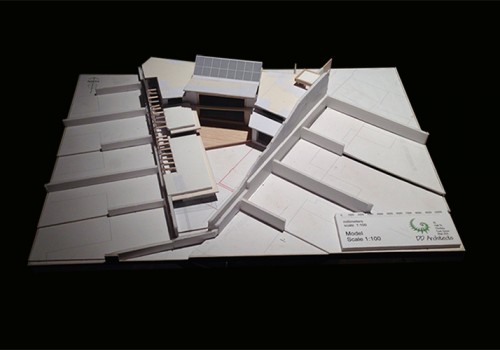
Read More
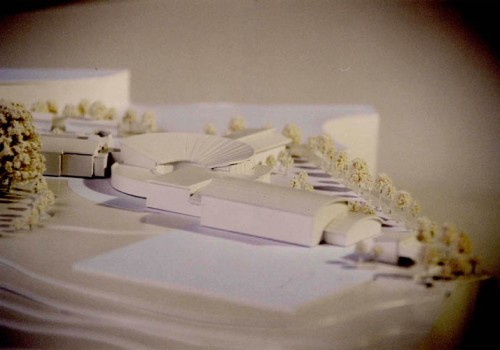
St Pauls School - Model Close Up 03
Model
Read More
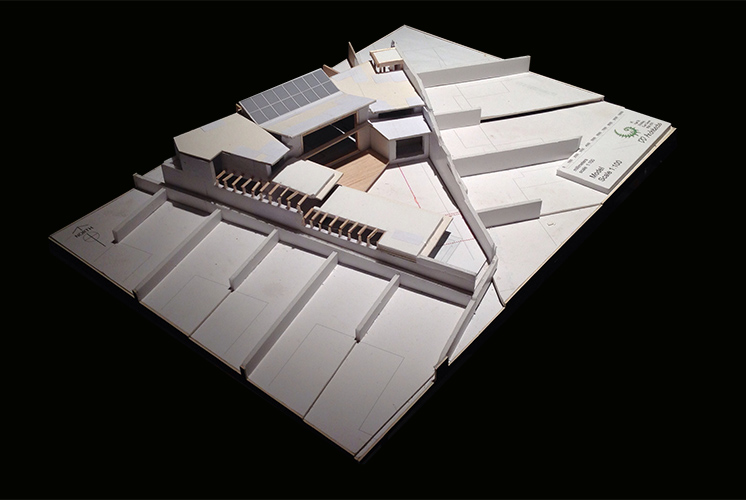
St Pauls School - Model Aerial View
Model
Read More
St Pauls School - Model Aerial Close Up
Model
Read More
Hook Farm - Proposed Sketch 01
Sketches
Read More
Hook Farm - Proposed Sketch 01
Sketches
Read More
Hook Farm - Proposed Render 01
3D Model
Read More
Hook Farm - Proposed Render 02
3D Model
Read More
Hook Farm - Proposed Render 03
3D Model
Read More
Hook Farm - Proposed Render 04
3D Model
Read More
Faulking - Model East
Model
Read More
Faulking - Model South East
Model
Read More
Faulking - Model South
Model
Read More
Faulking - Model South West
Model
Read More
Faulking - Model West
Model
Read More
Faulking - Model North West
Model
Read More
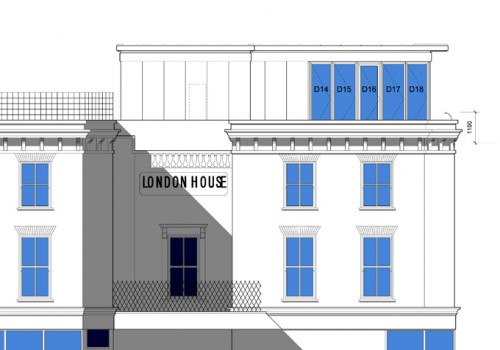
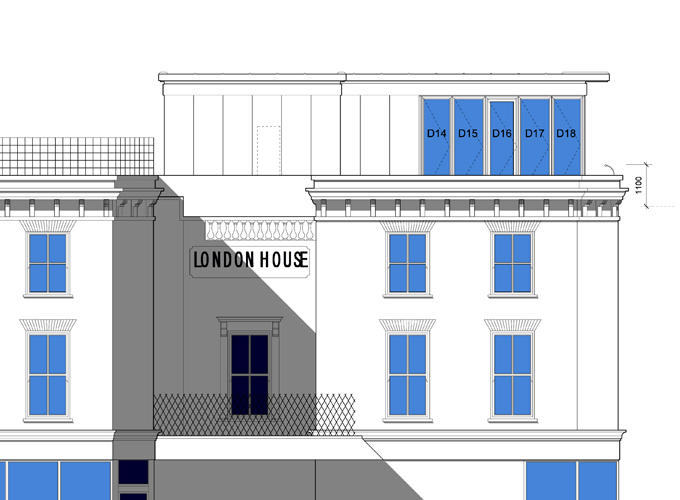
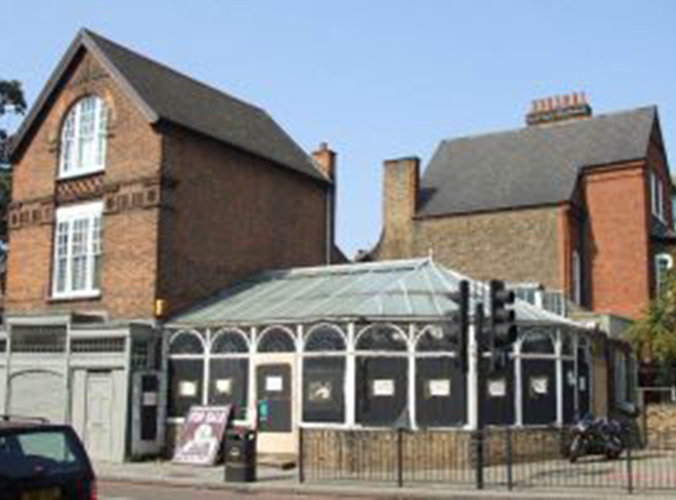
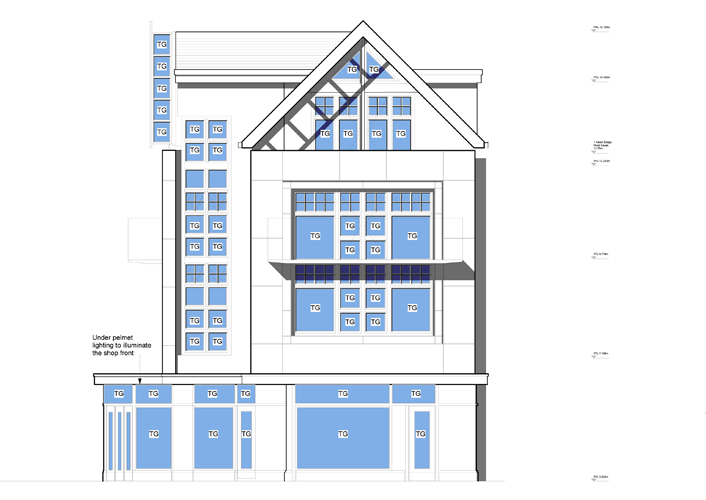
132 Church Road - Elevation
Drawing
Read More
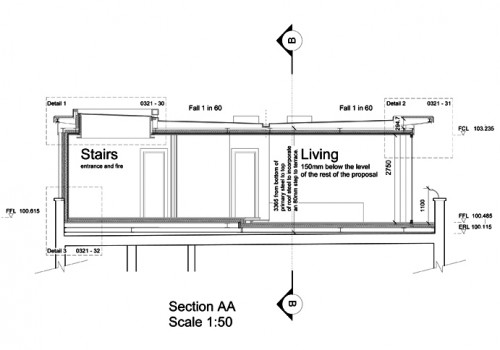
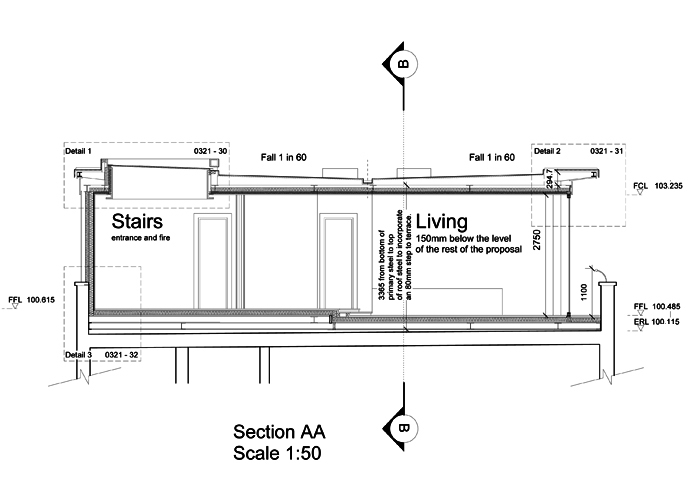
132 Church Road - Section AA
Drawing
Read More
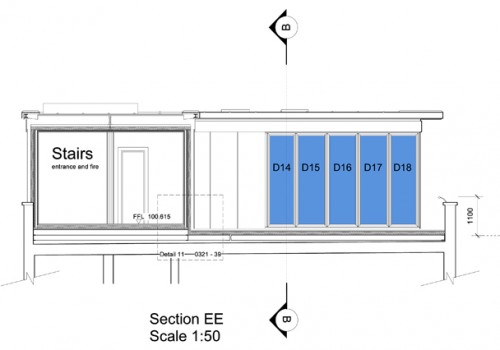
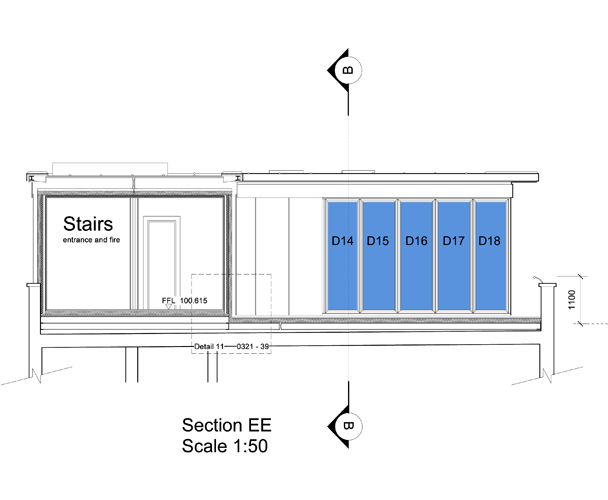
132 Church Road - Section EE
Drawing
Read More
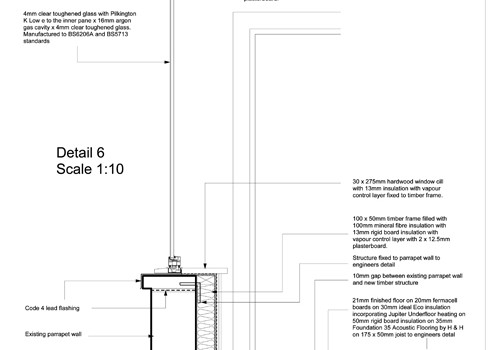
132 Church Road - Detail 6
Drawing
Read More
132 Church Road - Proposed Render 01
Read More
132 Church Road - Proposed Render 02
Read More
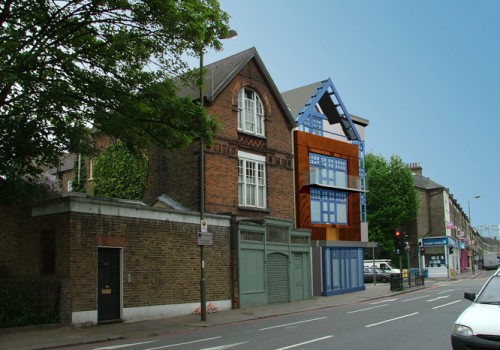
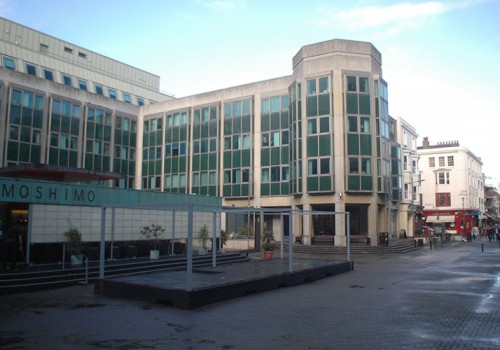
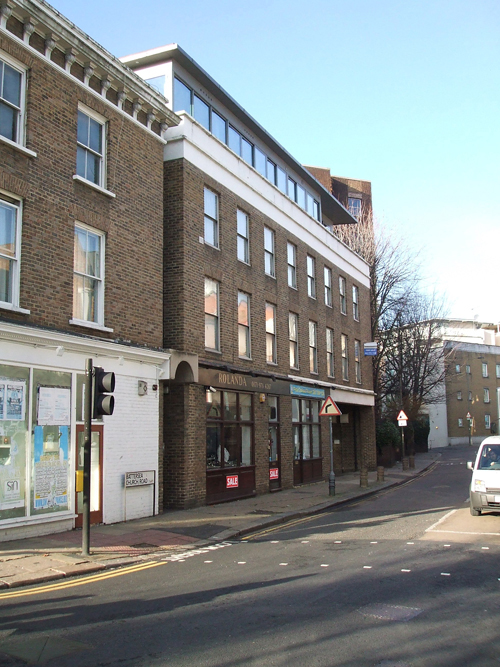
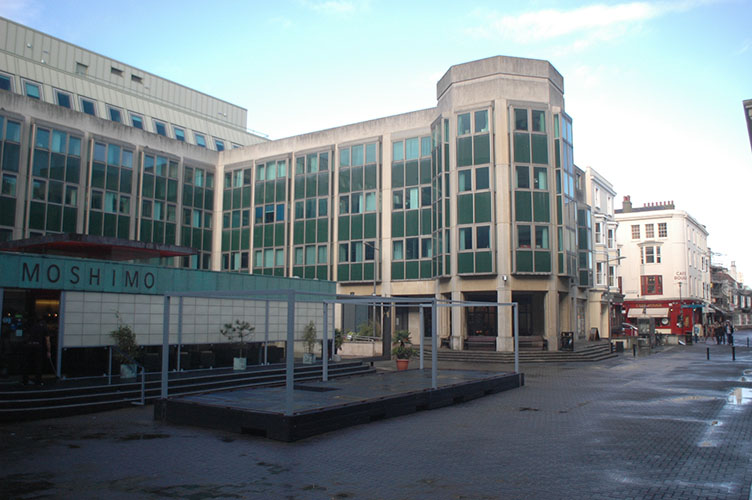
238 Battersea Park Road - Exisiting
Read More
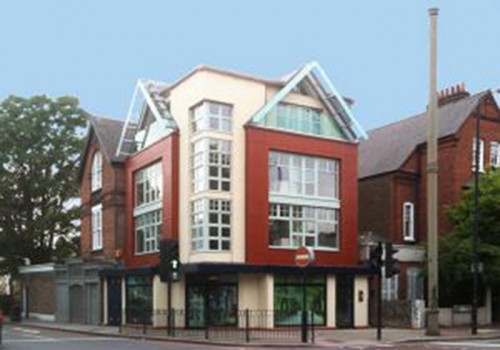
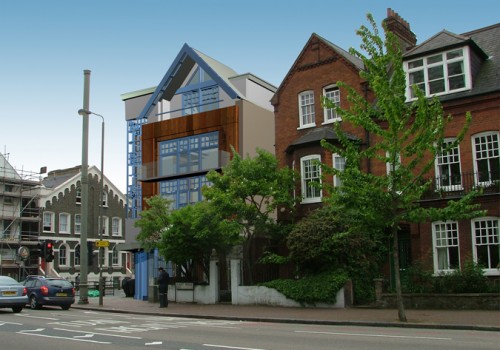
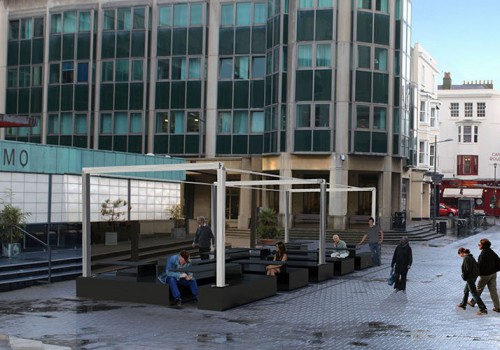
238 Battersea Park Road - Proposed Render 01
Read More
238 Battersea Park Road - Proposed Render 02
Read More
238 Battersea Park Road - Proposed Render 03
Read More
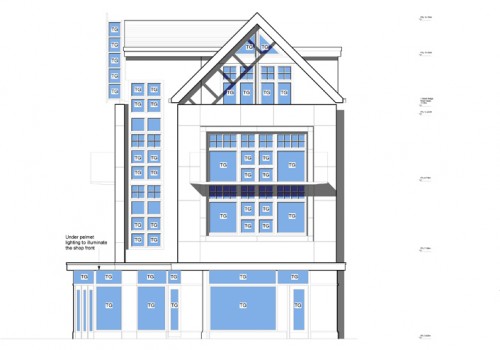
238 Battersea Park Road - Elevation 01
Drawing
Read More
148 Preston Drove - Concept Model - West
Read More
148 Preston Drove - Concept Model - East
Read More
148 Preston Drove - Concept Model - South East
Read More
148 Preston Drove - Concept Model - South
Read More
148 Preston Drove - Concept Model - South West
Read More
148 Preston Drove - Concept Model - North
Read More
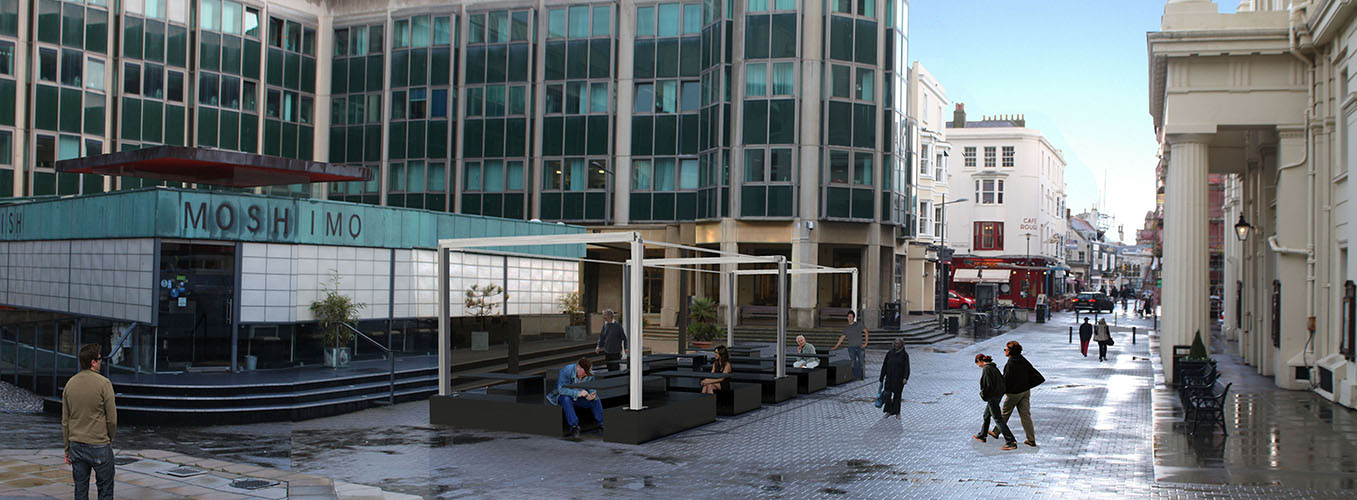
Moshimo - Proposed Render 01
Read More
Moshimo - Proposed Render 02
Read More
Moshimo - Proposed Render 03
Read More
Moshimo - Proposed Render 04
Read More


